Upgrading Your Select List Fields (Step-By-Step Guide)
A select list field gives a form user a dropdown list of values to select when completing a form. The most common way to create a list of options for a select list is to simply type them in, one at a time, in the Multichoice Options tab of the field editor.
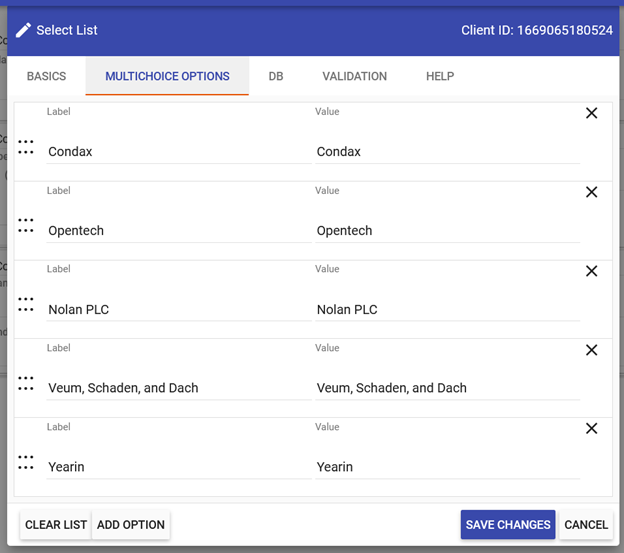
These Multichoice Options are static, and if you want to edit them, you can go back in and add, delete, or change the options as needed.
However, there are some scenarios where this can be a little unwieldy. For instance:
- You have a central list of items that are used and referenced across multiple forms (vendors, GL Codes, Parts, etc.)
- You have an extensive list of items that are frequently updated (think a list of current employees, for example)
- You have a list of items that need to be edited by multiple different people.
In these scenarios, having a static list of values that constantly needs to be updated and maintained can quickly get out of control. Instead, you can configure your Select List fields to pull values from a database query. In this method, the list items reside in a database. They are pulled into the form in real-time as a user completes the form, allowing for easier data maintenance and consistent and accurate values across your forms.
Creating a DB Select List with Integrify Data
There are many scenarios where you are already capturing values in Integrify that can be leveraged in a Select List configuration. For example, you may store employee data in your Users setup that you want to pull back into an internal form for time off requests. Instead of manually entering this information on the Select List setup, you can pull this data from the Integrify database and present it in the form for the user in a few simple steps.
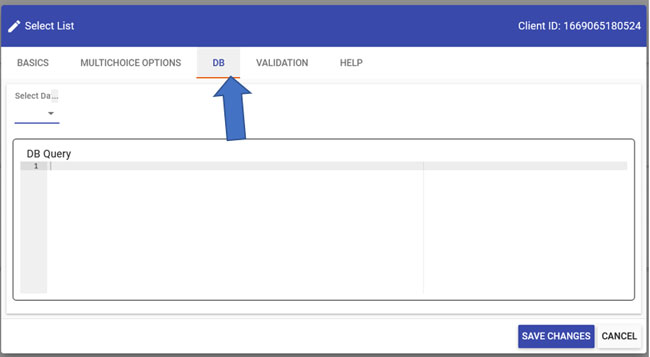
1. Add a Select List question to your form and click on the pencil icon to open the field configuration settings.

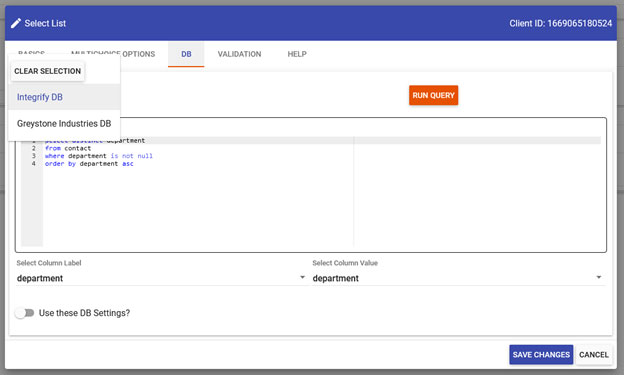
2. Click on the DB tab at the top of the dialog.
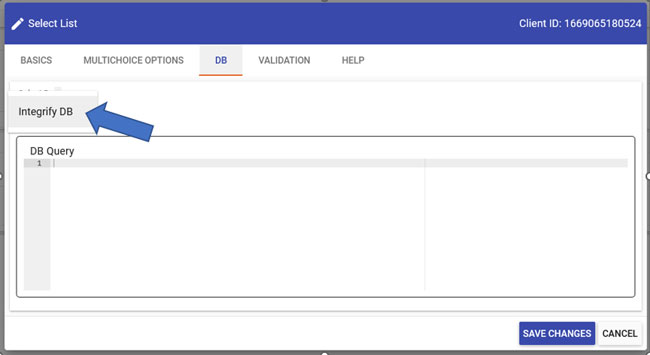
3. Under the Select Database option, select "Integrify DB.”
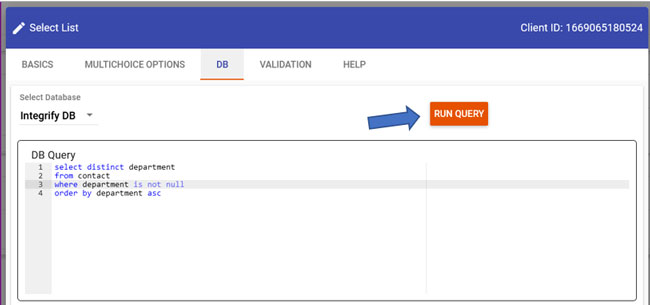
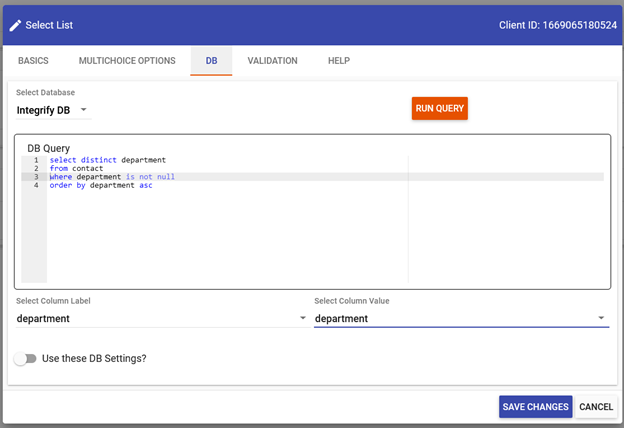
4. Write your DB Query to pull the data you want to capture. For the Integrify DB, this would be a SQL Server selection query. In our example, we want to pull the department from the Users setup, so this would be a query on the CONTACT table.
5. Click the "Run Query" button at the top of the dialog. This will confirm that you've entered a valid query that returns results.
6. If the query is valid, additional configuration options will be displayed. Both of these values need to be set for the Select List to function properly:
- Select Column Label: represents the visible portion of the HTML control the end-user can see. In the Select List, these options are presented to the user when they click the dropdown.
- Select Column Value: represents the value that can be associated with a DB Label. For instance, in a list of job titles, the end-user may see Area Manager; however, the value associated with that particular option may be a job code value such as AREAMGR_01
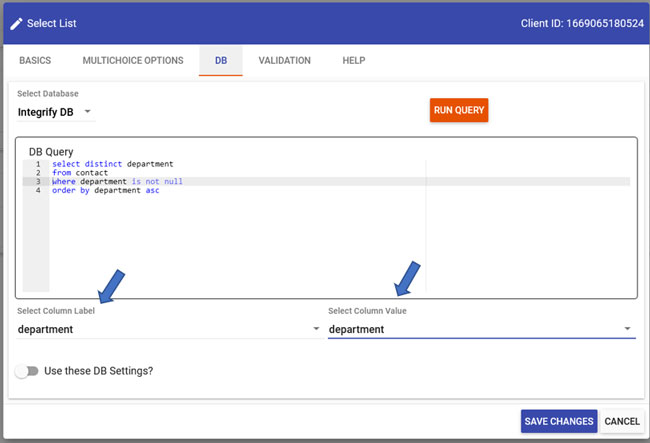
7. Once you've completed the necessary configuration, turn on "Use these DB Settings?" and click "Save Changes" to complete the Select List configuration.
Creating a DB Select List with External Data
While connecting your Select List questions to the Integrify databases can cover many use cases, it may also be beneficial to reference data sources outside of Integrify on your forms. Suppose your Select List data is stored in a SQL Server or Oracle database. In that case, you can easily connect these sources to your Integrify instance and seamlessly pull them into your forms for quick configuration.
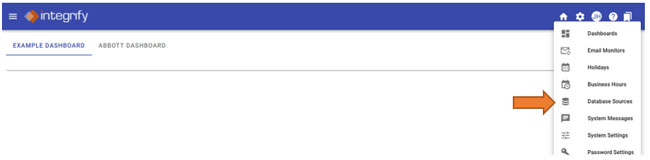
1. From the home page, hover over the Settings gear icon and select Database Sources.
2. Click the "Add Connection" button at the top of the page.
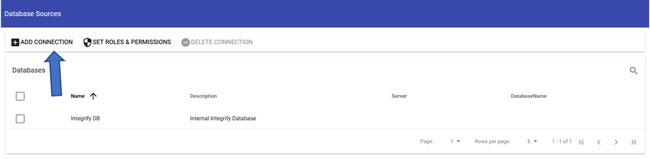
3. In the dialog, provide the connection information for the data source you want to link to your Integrify instance. You may need to contact your system/database administrator to get appropriate access to your internal data source and the necessary credentials and connection information to input here.
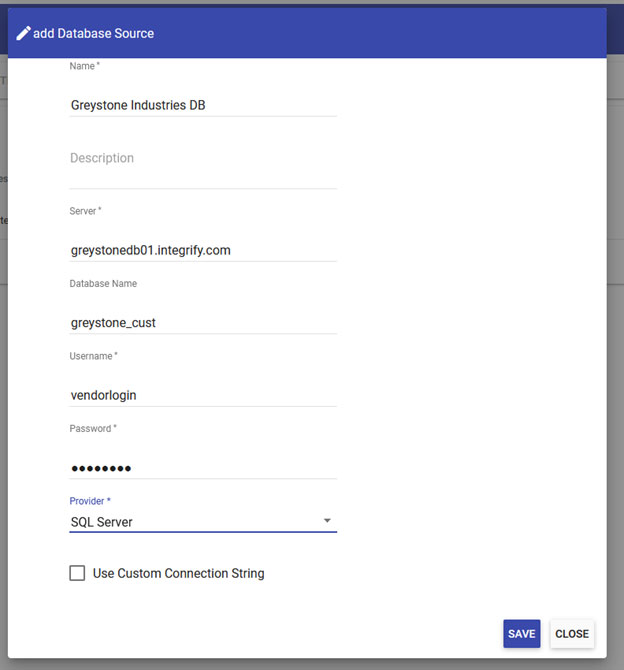
4. Once you've added the necessary information, click Save to complete the external data source setup.
Once you've set up your database connection, you can follow the same steps as above to set up a Select List. Still, instead of selecting the Integrify DB as your database source, you can now select the custom database that you configured.
Examples
No matter what industry you are in, connecting your form questions to database sources can be very powerful and provide you with accurate, consistent data, saving you time to clean up and standardize your form answers down the line. Here are just some of the many examples of how our customers are leveraging this functionality to streamline form submission:
- You are building an HR recruiting workflow for your organization that requires information about the open position to be entered on the initial form. By linking your Integrify instance to an external Active Directory database, you can capture all available job titles and departments to populate LOVs with the latest available positions.
- Your organization has a workflow that contains a guest form for external vendors to submit invoices. To ensure that the accounting department has the correct information to send payment, you can configure a Select List of authorized vendors that will then automatically populate mailing addresses and any other information in the database table about that vendor.
- An IT equipment order form in your environment could be set up to include a Select List with computers and accessories that have been approved for purchasing, eliminating the need for back-and-forth communication between IT and other managers on what computers they are able to purchase for their staff.
Conclusion
While manually configuring Select Lists can help streamline form submissions in many ways, you can see that there is even more potential when leveraging Integrify’s database connections. Whether you are aiming to save time by capturing ever-changing data on form questions, or looking to make form submissions consistent and easy to process, upgrading your Select Lists is a great way to get the most mileage out of your Integrify processes!