Price Quote Request Details
This section will show details on how to Create, Edit, and Map your PDF.
Creating a PDF from scratch to become a mapped field document
1. Open up Adobe Acrobat and go to file > Create > Blank Page.
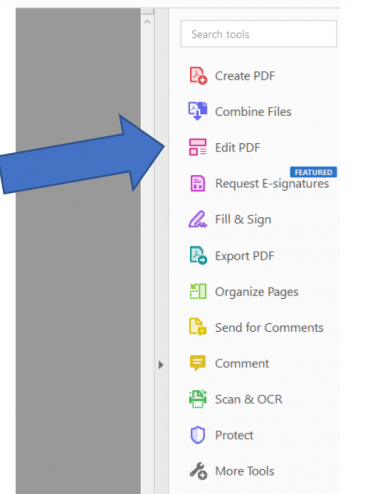
2. Choose Edit PDF on the right-hand side.
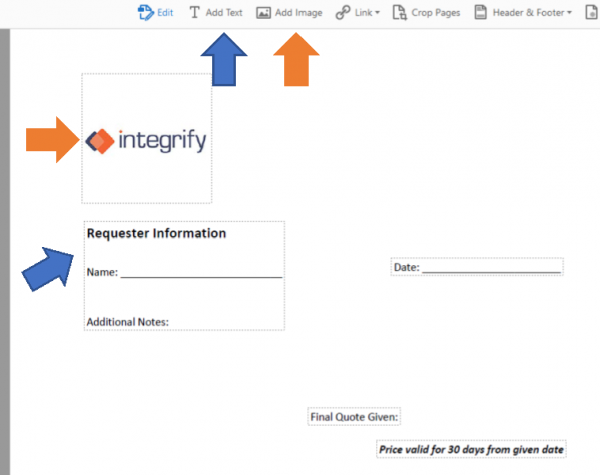
3. Add text and images to your form for the required fields that you would like to include in your PDF.
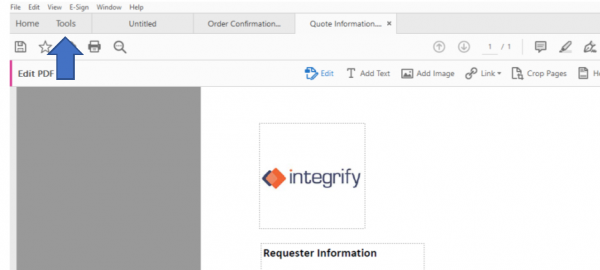
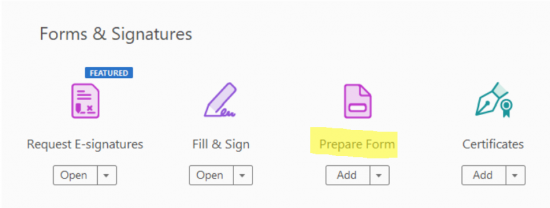
4. After all of your required fields are included on the document, click on “Tools” on the top left of your Acrobat window.
5. In the Tools window, under “Forms & Signatures” select “Prepare Form”, select your file you are working on, (or the file you already have created*) and click start.
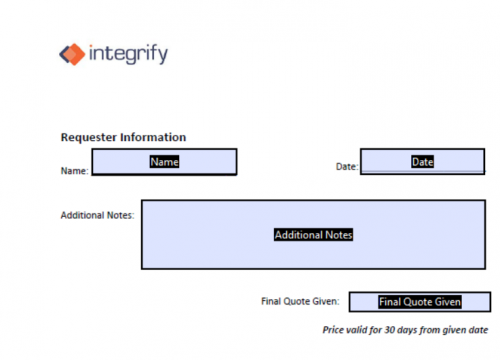
6. The top banner should now include fields that you can drag onto your form in the correct sections. There are multiple types of field boxes that you can use. To use in the Integrify instance, it is easiest to use the “text box” or “check box” fields.

a. Choose the field you’d like and highlight it over the section you would like the Integrify system to map to and name your field. Your final form should look something like this:
7. After all of your fields are mapped you can save your new PDF. File > Save as > and name your document.
After you have created your PDF, add it to the process.
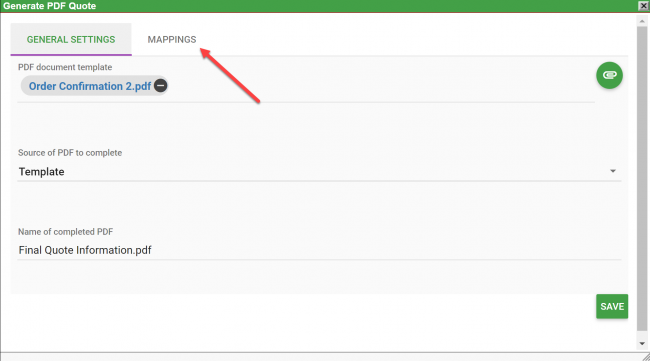
1. In the Generate PDF task, hover over Configuration and select Configure Task.
2. Next, add the PDF that you created in Adobe in the PDF document template field.
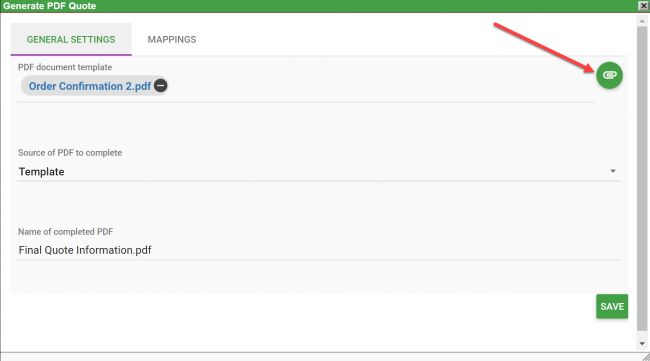
3. For source of PDF to complete, choose Template.
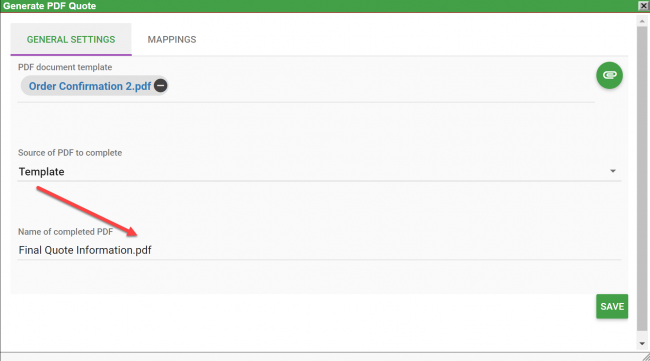
4. Next, write a name that the PDF will download as everytime. *Make sure after you name it, you put ".pdf" at the end!*
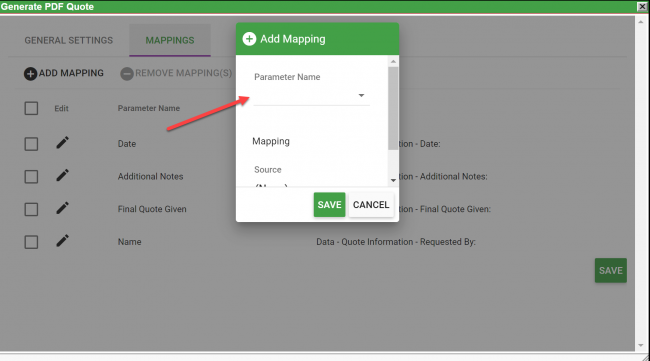
5. After configuring the PDF, click the Mappings tab.
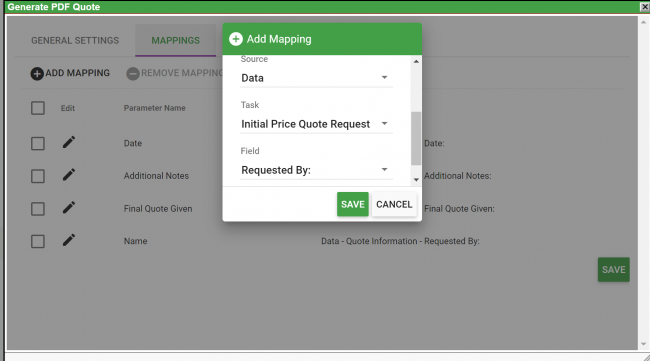
6. First, click add mapping. Under Parameter Name should be all the fields you created on your PDF in Adobe.
7. Repeat step 6 for each field. For this example, we'll start with "Name". In the Source field, choose Data. For the task, choose the Form you are mapping from. In this instance, it is the Initial Price Quote Request Form, then select the field on the form that matches to your PDF, in this example it is "Requested By" that maps to the "Name" field.
This is an example of four mapped fields.
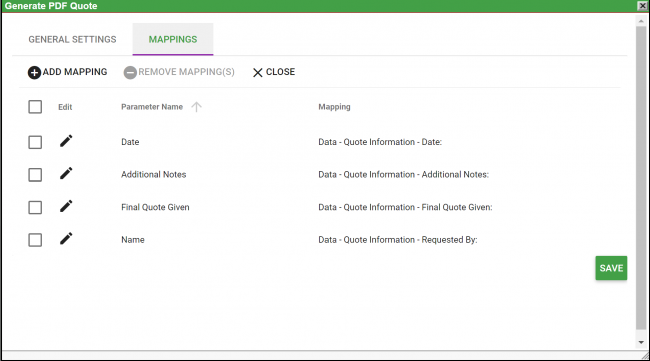
8. Once every field is mapped, dont forget to click save at the bottom. Then, run through a test of the process and each field from the form that was mapped, should generate into the PDF.
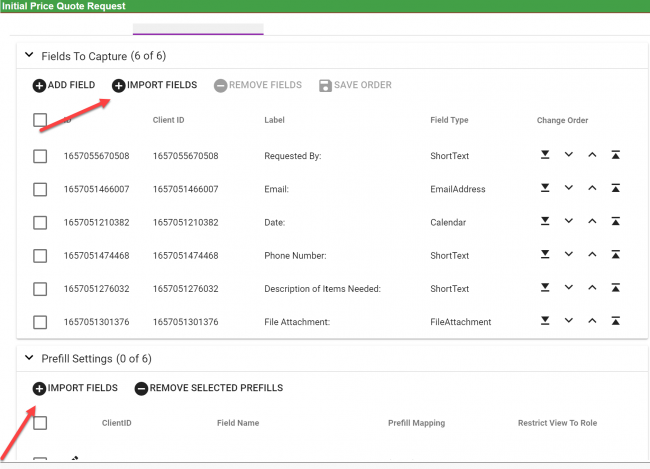
Note: If any field names on the form are changed, you will have to hover of the Form task > Configuration > Configure Task > Advanced Settings > and Import Fields under "Fields to Capture" and "Prefill Settings". Then go back into the Mappings on the PDF generator and add the field again.