Creating Reports
Watch the Video: Creating Reports
Creating Reports
This article will cover how to:
- Create a new report.
- Copy, Delete, and Export a report.
- Use Links/API options.
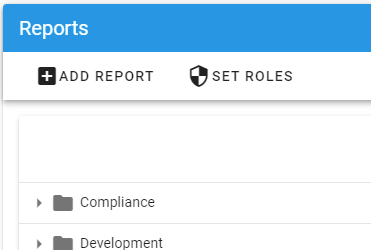
To create a new report, navigate to Reports > Add Report > New under the Administration menu:
You will be presented with the following screen:
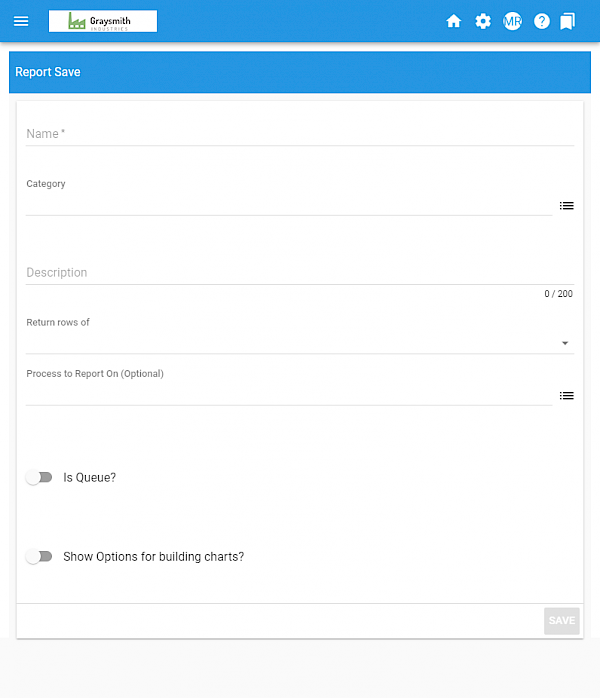
Once all required fields have been completed, select Save. The following is a list of each attribute and its purpose:
| Attributes | Options | Required | Description |
| Name | Free Text | Yes | This will be the name of the report as presented to your end-users. |
| Category | Any Category | Yes | This is the category where the end-user would look for the report under the My Reports menu. |
| Description | Free Text | No | This description is displayed to the end-user when they are viewing the report under My Reports. |
| Return rows of | Requests, Tasks or Custom | Yes |
If you are summarizing form-specific data (like the project cost entered on the form), you may elect to summarize the data at the Request level or the Task level. If you need to build a report that queries the internal or an external database, choose Custom. |
| Process to Report On | Select the workflow you would like to report against. | No |
Select the specific workflow you would like to report against. You can leave this empty if you are looking to create a report using data from more than 1 process. If you change the process a report is based on, you will need to refresh each column and filter the definition to ensure that the report will function correctly, even if the two processes are copies of one another. |
| Is Queue? | Binary | Yes |
If not selected, then the report will retrieve any task or request information regardless of the user's involvement in that particular process you are reporting against. If selected, then the report will only retrieve task information based on open tasks for the user executing the report for that particular process. Additionally, a link is provided from the report directly to the open task for that user to complete. If you want to build a report that includes a user's personal requests regardless of task status, use the "Only report data attached to current user (Requests, Assigned Tasks)" report limit option instead. Be aware that choosing this option will override the selection of report type to "return rows of tasks" if you chose a "return rows of requests" type report. |
| Show options for building charts? | Binary | Yes | If you want to display either a line, column, or pie chart with the report, select this option. |
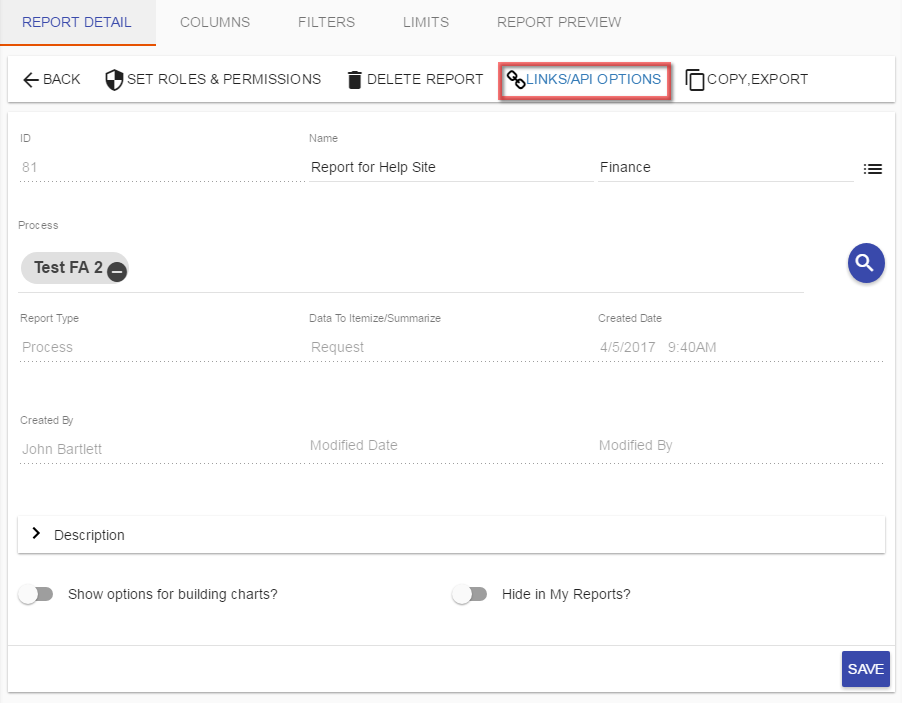
Once you add a Report, the Report Details tab will display. From here, you can Delete, Copy or Export the report:
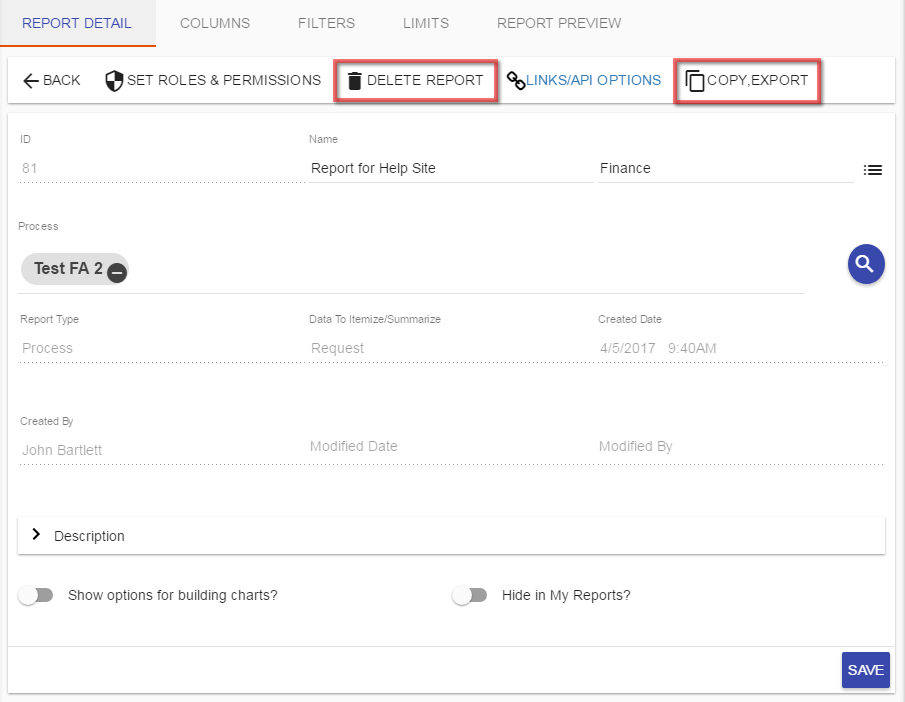
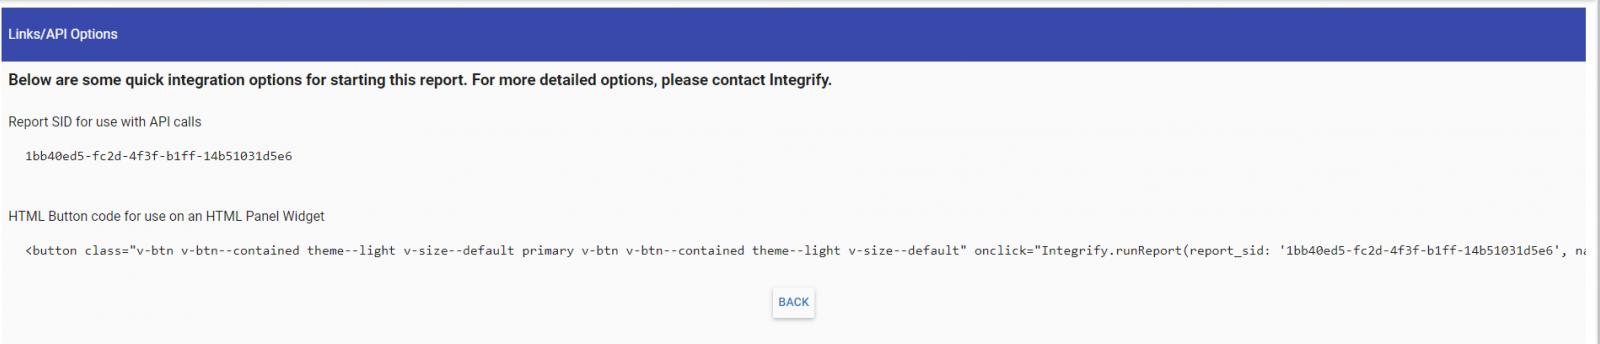
Links/API Options
For customers that have the Integrify API, the Administrators can select the Links/API Options button to see how to link to the report. This allows for the report to be linked to from external webpages and/or within an Integrify HTML Panel widget.
Simply copy the code from the Links/API Options display:
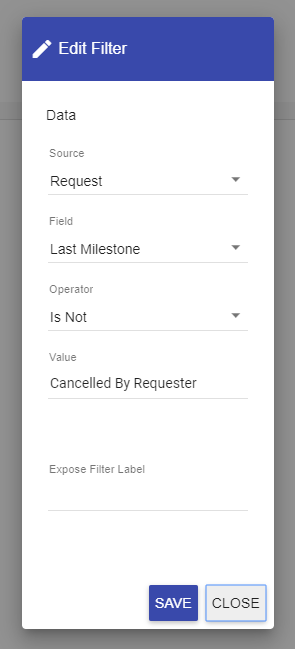
Reporting and Canceled Requests
Canceled requests can be included on reports. To remove the canceled requests from a report, a report filter should be added as follows:
Source: Request | Field: Last Milestone | Operator: is not | Value: Cancelled By Requester. See the example below.