New Trial User Step-by-Step
Welcome to your new trial of Integrify!
The best way to learn Integrify is to dive in and start building a workflow. This step-by-step guide will walk you through creating your first workflow in your trial account.
Watch the video or read the guide!
Hint: Keep this guide open in another window as you walk through the steps.
It's easier to approach the idea of building a workflow if you have an end goal in mind. While Integrify can be used to build very complex workflows, for the purposes of this walk-through, our end goal is to build a simple approval workflow.
Ready? Let's go...
Build a Form
Our approval process begins with a form that employees fill out to start the request process, so let's build that first.
Step 1: Create a New Form
- Select Administration from left Nav (if you can't see the left nav, roll over the three lines in the upper left of the header to display it).
- Select Forms.
- Select Add New Form from the top navigation.
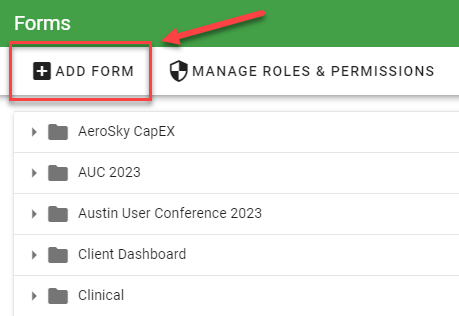
- Give the form a name.
- Add it to a category so people can find it. Categories are similar to folders.
- Save the form. You will then see the Form Builder screen:
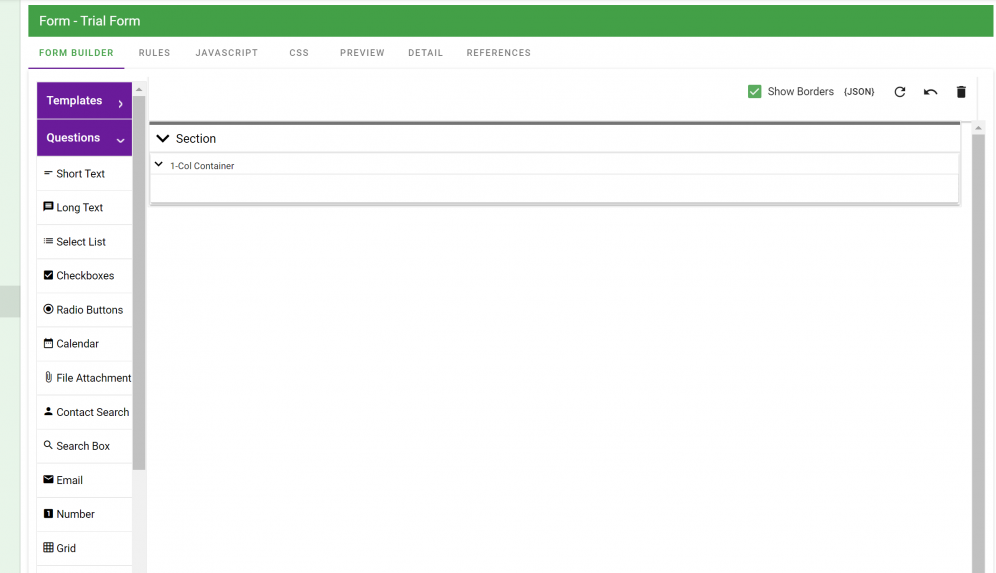
Step 2: Add Questions to the Form
See a detailed view of how to add questions to a form here: Create Form Questions
You can always preview your form by selecting Preview: Preview Form
For all form documentation, visit: Forms Documentation
Go ahead and add several questions/fields to the form.
Now that our form is created, let's move to the next stage.
Build a Process
When your form is submitted you'll want it to be managed in a specific way to ensure it's handled correctly. To do this you need to build a process for it.
Step 1: Create a New Process
See how to create a process here: Create my first process!
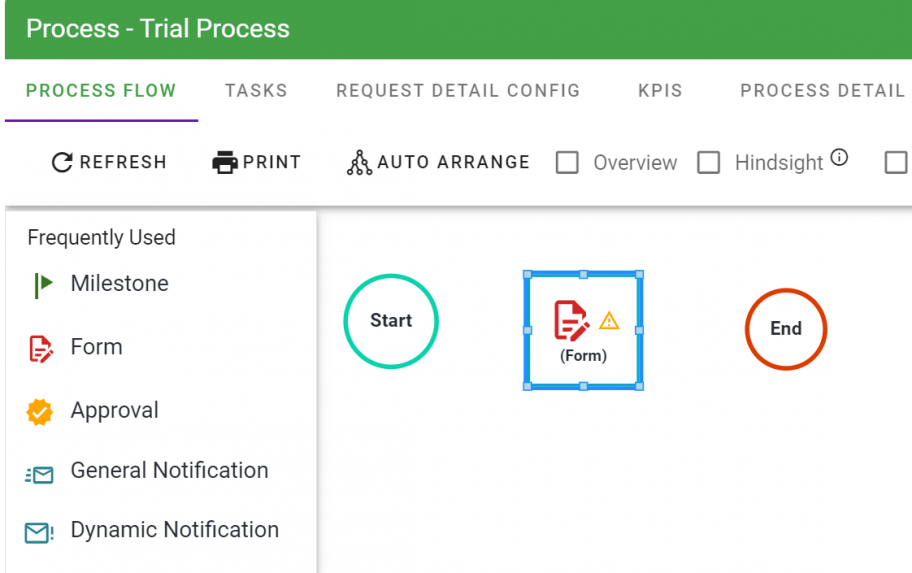
Step 2: Building Your Process
A process is really just a series of tasks. You'll next add tasks, connect the tasks together and then configure them.
Your process building begins with the Process Flow canvas. What is this? Check it out here: Process Flow Workspace
Add a task to start building your 1st process: Create a Task
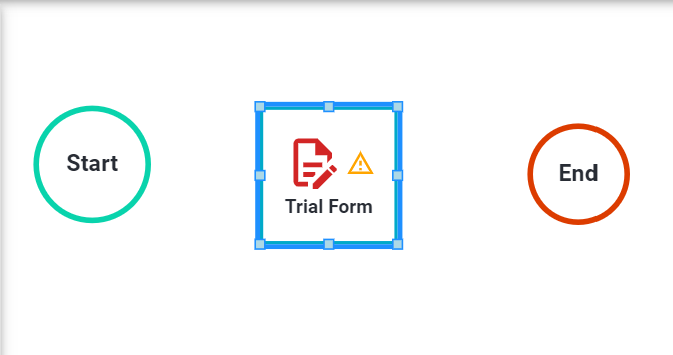
Let's add a Form Task that is configured to display the new form that you created. You'll see we automatically create a task called "Start Process" when you create a new process.
Drag and drop a form task from the list of task types:

Then, give the Form Task a name and click anywhere to save the name:

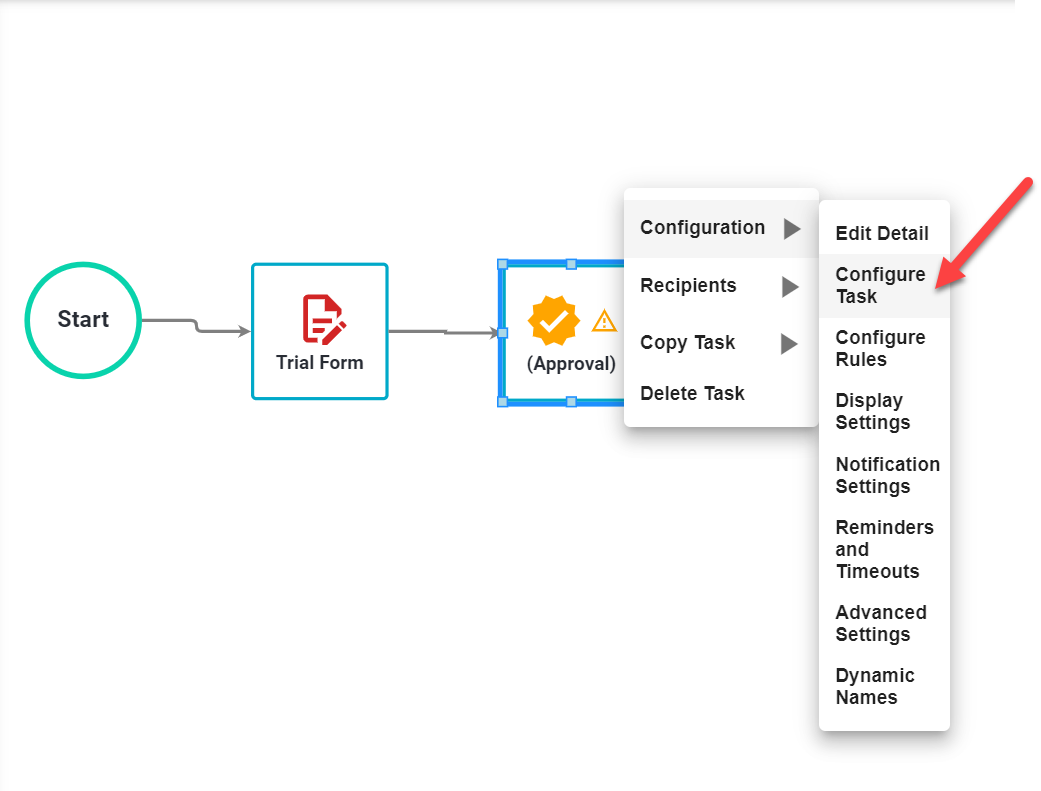
Right click on the form task to display the Task Menu and select Configure Task:

Click on the "Selected Form" field, look up your new form, and select it:

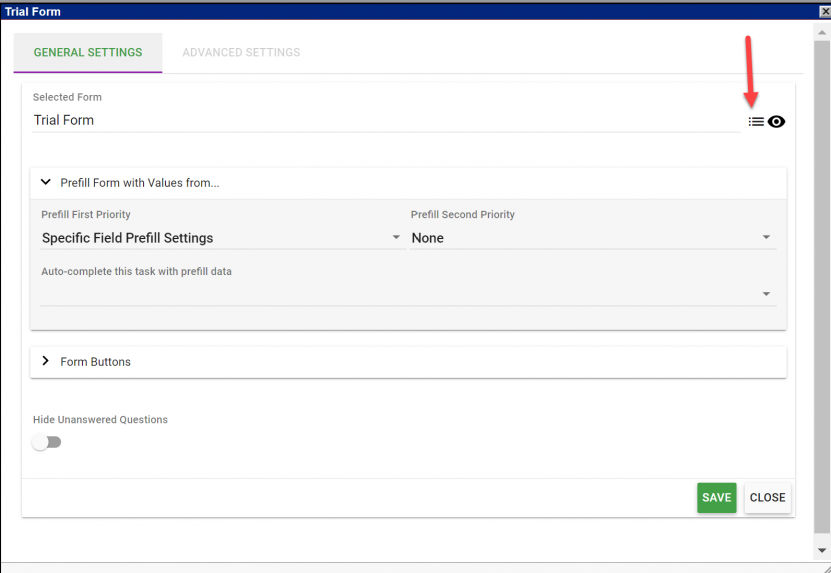
Click "Save" and "Close."
Now, drag a transition line from the middle of the "Start Process" task to the Form Task. You'll see a pink bar appear when you hover over a task. Drag it to the tasks you would like to connect. In this case, it is Start and the Trial Form.
Note: You can also connect two tasks by dragging the new task onto an existing task.
Next, we need to add a "Recipient" for this Form Task. A Recipient is a person who is assigned a given task. Since the request form is the first task in this process, the Recipient is the person who starts the request and completes the form. That means the Recipient is the requester. So let's assign this first task to the requester. Right click on the Form Task and select "Recipients" from the menu.
The recipient window allows you to select a dynamic recipient, which means the task will be assigned automatically to the appropriate person. In this case, we want to automatically assign the Form Task to the Requester. Click on the filter icon next to the magnifying glass and select 'Dynamic'.

Once you have added the Requester as the Recipient, select "Close."
Congratulations! You have completed your first task configuration!
Now we will want to add the next task, which will be an Approval Task. This will allow us to assign the completed form to someone to review it.
- From the list of tasks on the left, drag the Approval task into the work area and drop it below the Request Form.
- Name the Approval Task
- Right click on the Approval task and select Configuration / Configure Task
We want to give the person reviewing the completed form some options to select. These could be things like "Approved," "Denied," "Need more information," etc.
- Select Add Option
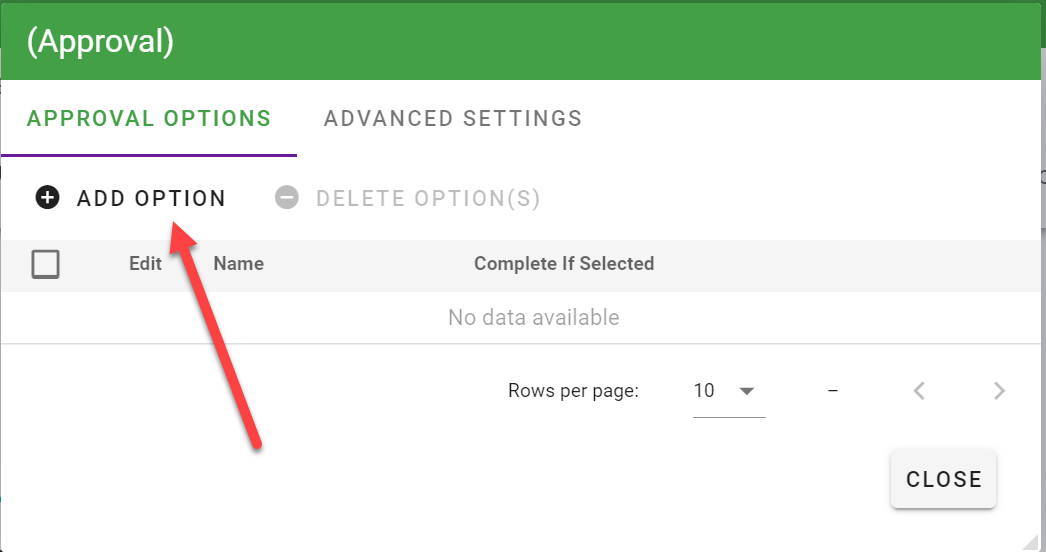
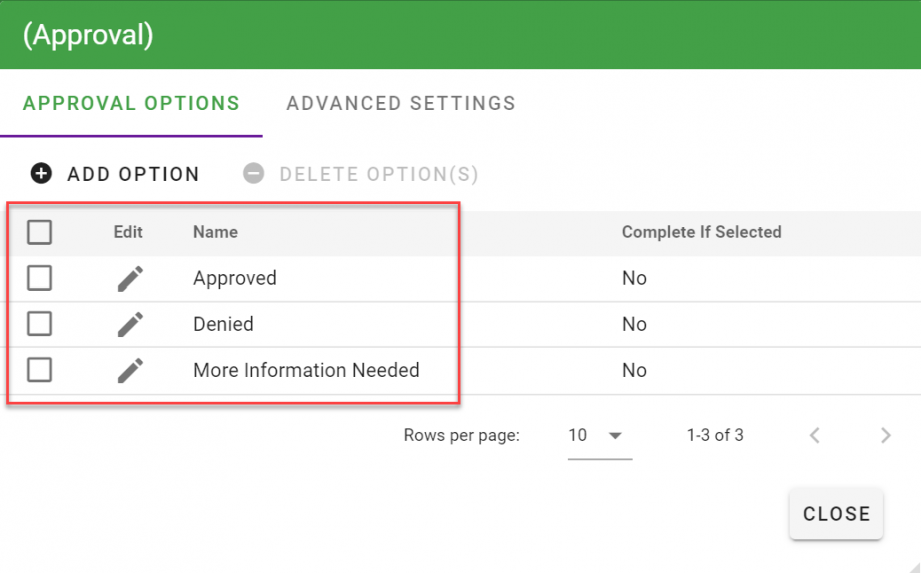
- Let's give the person approving the request these options to choose from: "Approved," "Denied," "More Information Needed."
When you're done creating the options, select "Close."
Next, like before, connect the Form Task to the Approval task by hovering over the Form task and dragging the arrow to the Approval task. This will now trigger the Approval task when the Form is completed.
To learn more about approval tasks, go here: Approval Task
So who will be approving the request? Let's assign an approver.
- Hover over the Approval task and select Recipients.
- In the Recipients filter search, check the "Contacts" and "Groups" options.
- Click on the "Plus" button next to a Contact or Group to add it to the window on the right side.
- Select "Close".
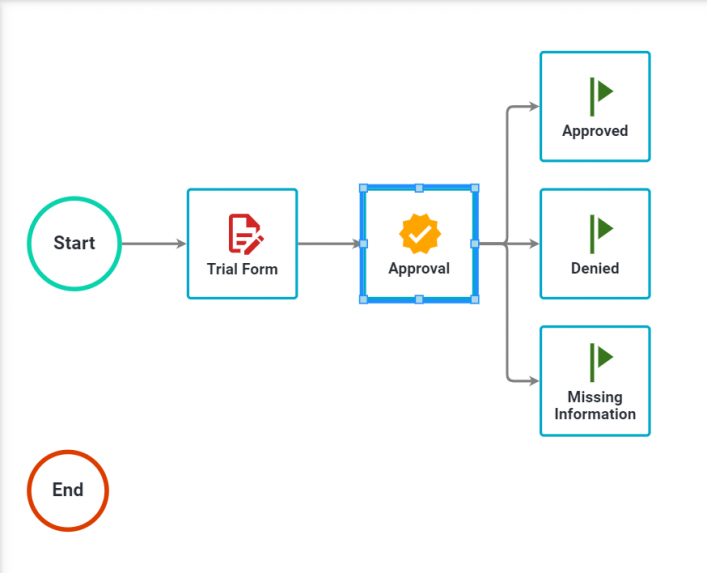
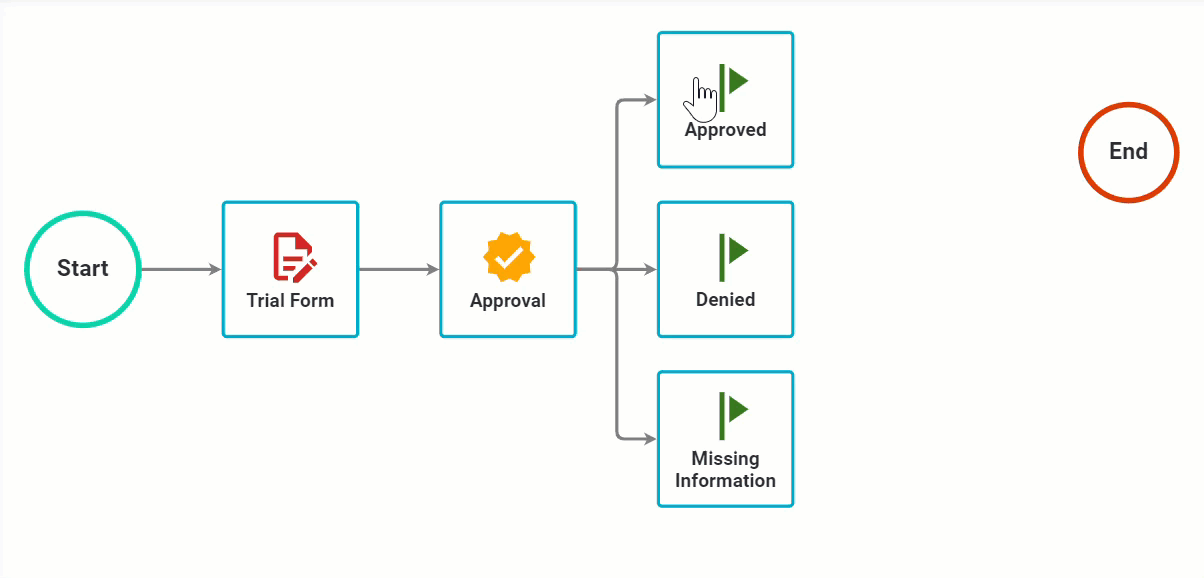
Now let’s add a couple of Milestones to complete this simple process! Milestones are used to update the overall status of a request. Completed milestones also show up in reports and KPI dashboards so you can keep track of progress.
- From the task list grab a Milestone and drop it into the work area next to the Approval task.
- Name it "Approved."
- Add another Milestone for "Denied" and "More Information Needed"
- Connect the Approval task to the three Milestones.
It will look something like this:
Step 3: Conifguring Rules
Now we need to talk about Rules. By default, when you connect one task to another, the second task starts when the previous task completes.
In this simple approval process, we're creating, we want the "Approved" milestone to trigger only when the Approver selects "Approved." Makes sense, right?
- Right click on the Approved milestone and select Configuration / Configure Rules.
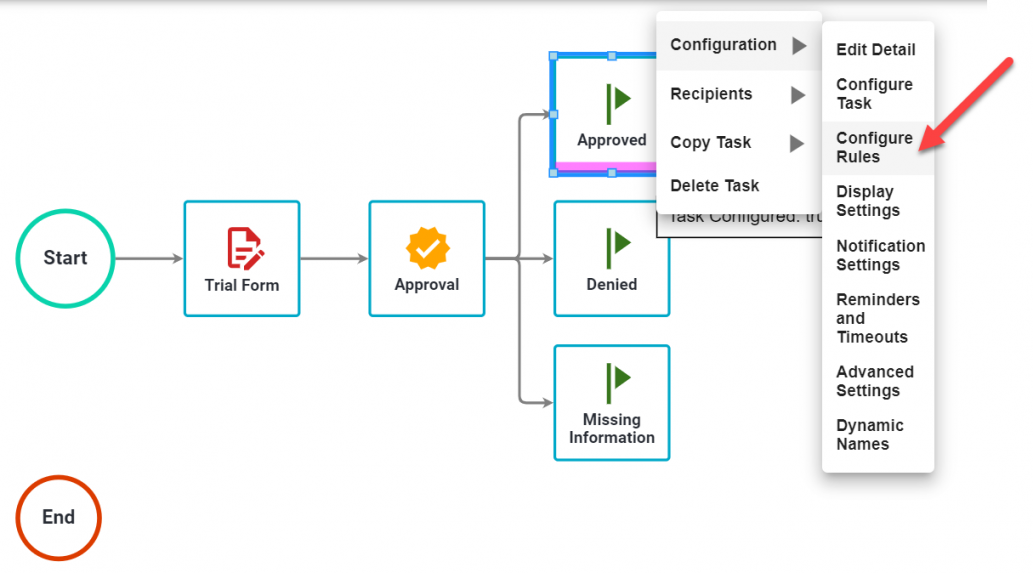
- In the "Configure Rules" window, select Add Rule
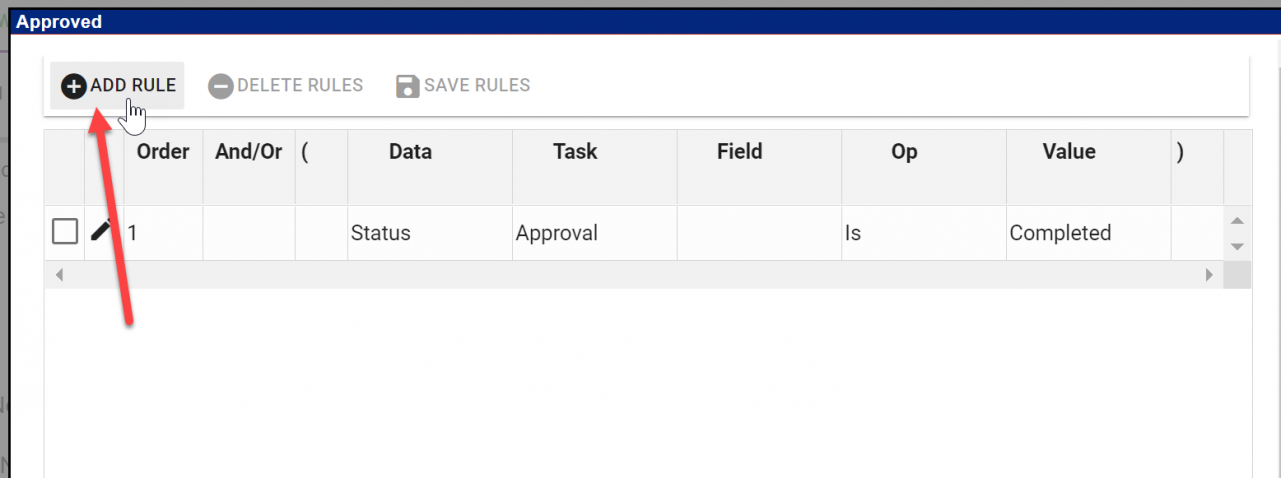
Note: You'll see that there's already a rule in place for when the Approval Task is completed. That's by default. We just need to add an additional "AND" rule that says the task was completed AND "Approved" was selected.
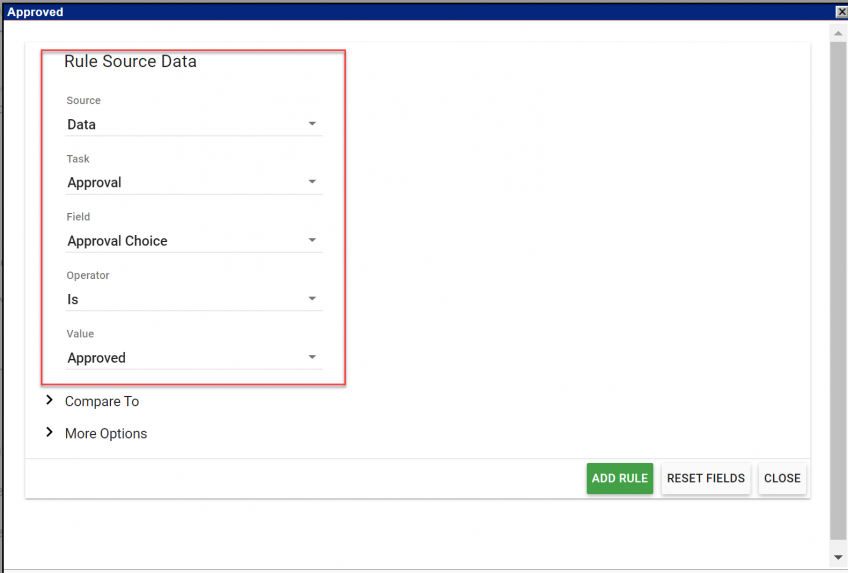
OK, this is where you have a lot of options but let’s keep it simple. We just want to add a rule that looks at the Approval task and checks if "Approved" was selected by the Approver.
- From the "Source," drop-down select "Data". You will be given several more options.
- From the "Task" drop-down, select the Approval task you created.
- Skip down to "Value," which will now show the three options you created (Approved, Denied, More Information Needed).
- Select "Approved" from the Value field drop-down.
The rule will look something like this.
- Select Add Rule at the bottom of the window.
- Select Close.
Now repeat this process for the two other Milestones ("Denied" and "More Information Needed"). Make sure to select the appropriate Values for each.
We want the process to end when either the "Approved" or "Denied" milestones are selected by the Approver. Typically you'd also want to send out email alerts to the requester informing them of the decision but we'll skip that for now.
We also want to shut the request down and mark it as completed when the Approved or Denied milestones run. We need the End Process task in this workflow so that this can happen.
Drag the arrow from the Approved Milestone to the "End" task and do the same for Denied.

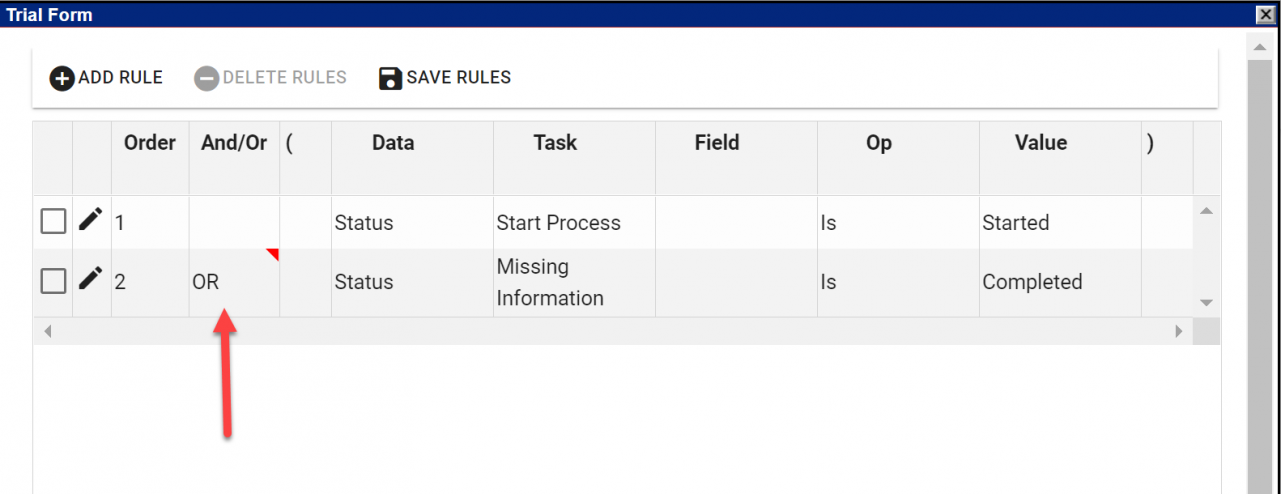
Finally, let's make it so when "Missing Information" is selected by the approver, the process is routed back to the original form to add more information. We also have to make sure that the Form task is set up to handle both new requesters and requesters that have come back to complete more information.
- Connect the "More Information Needed" milestone to the Form task.
- Hover over the Form task and select Configuration / Configure Rules. The "Configure Rules" window will come up showing two rules, one for people starting the process and one for people for whom "More Information is Needed." We'll want to change the "AND" to an "OR."
- Double Click on "AND" to use the drop-down to click "OR" so either situation will be valid.
It should look like this:
- Click "Save Rules" and close the window.
You have now created a workflow. Give yourself a quick round of applause!
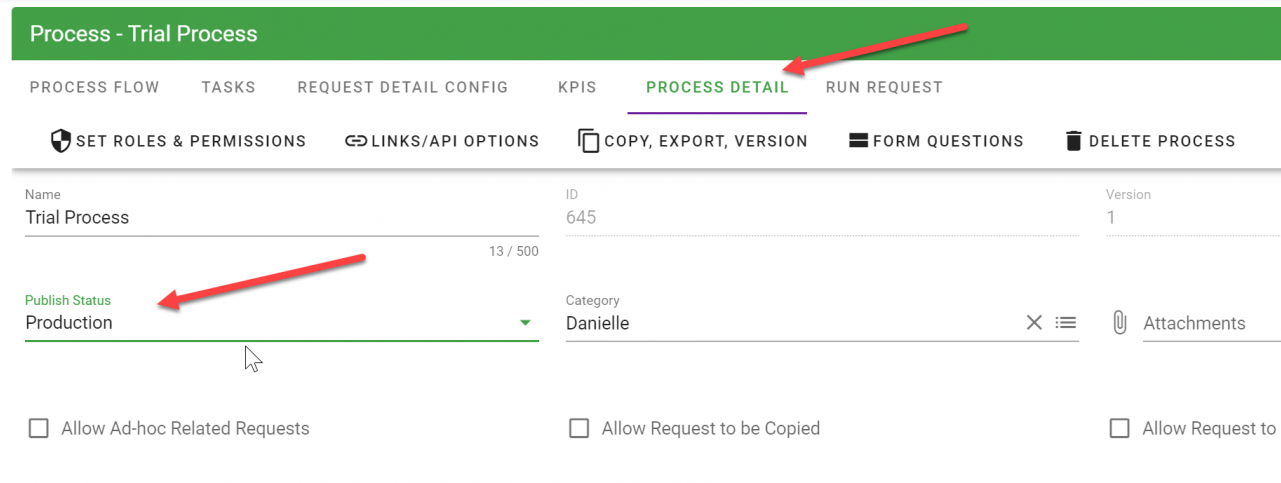
In order for end-users to be able to see the process and start a request, you need to move it into Production. Here’s how:
- Select the Process Detail tab up on top.
- Find "Publish Status" in the detail list.
- From the dropdown in the Publish Status window, select Production.
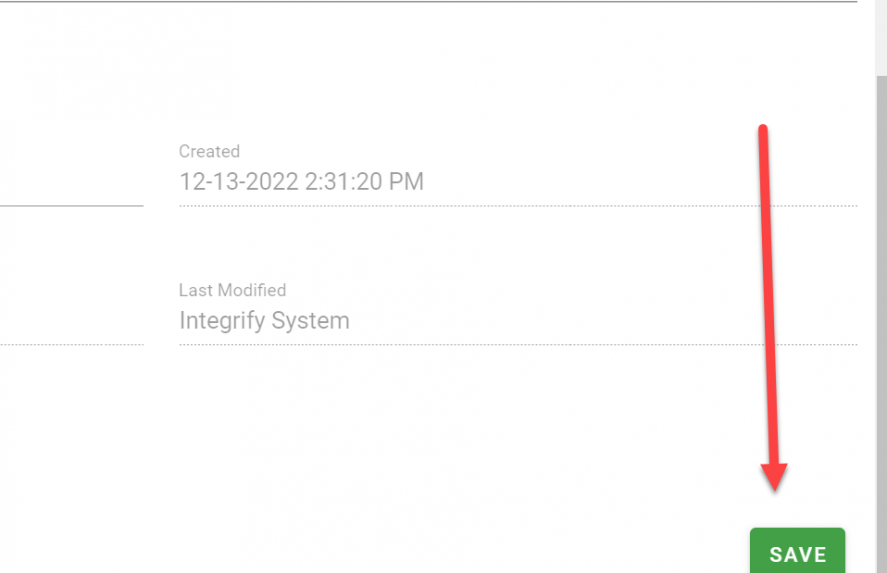
- Scroll down to the bottom and click "Save".
It’s Alive!
When users log in they will only see Actions on the left side navigation and not all the administration stuff you've been using.
From Actions, end users can select Start A Request to locate and initiate the process you just created. Go ahead and give it a try!
To learn more about all of the task types and what they can do for you, go here: Available Task Types
Integrify is very robust and can support a lot of different types of workflows, account for complex rules that start tasks, including KPIs for your processes, integrate with databases and external applications, manage task escalations, due dates, reminders, and more.
To learn more, go here: Process Documentation
Feel free to play around with your new process or create more!
More Videos on Getting the Most out of Your Integrify Trial
Creating a Process
Creating a Form
Configuring an Approval Task
Configuring a Form Task
Watch a Recorded Demonstration of Integrify