Create Form Questions
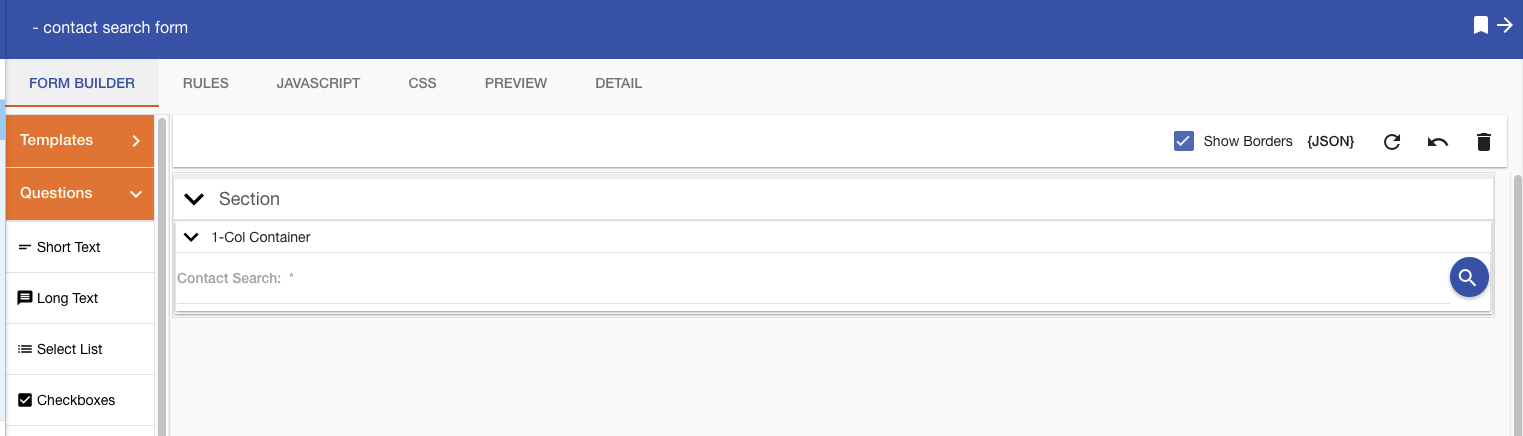
A form is composed of questions (or fields) that are arranged within the form's layout.
A form layout is created using Sections and Containers. Sections hold containers and containers hold questions. New forms contain a section with a container by default. You can drag additional sections and containers onto the form layout using the Layout menu on the left.
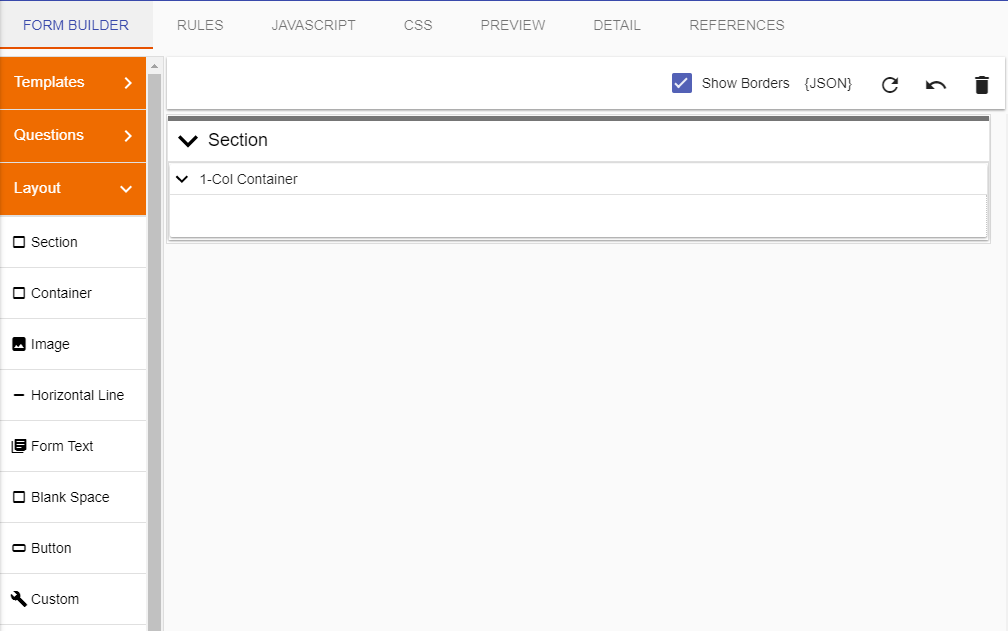
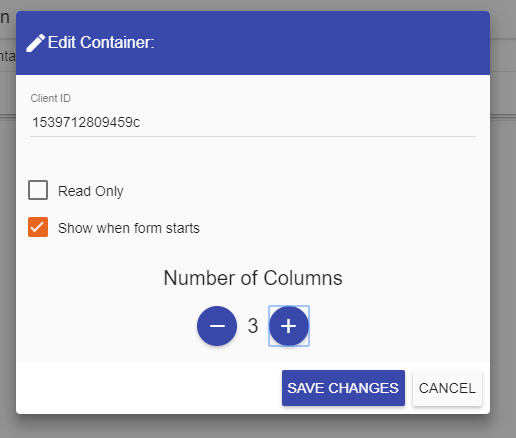
A container can be single or multi-column. To make a container multi-column, hover over the container and select the pencil icon in the upper right to edit it. Click the "+" button to add additional columns.
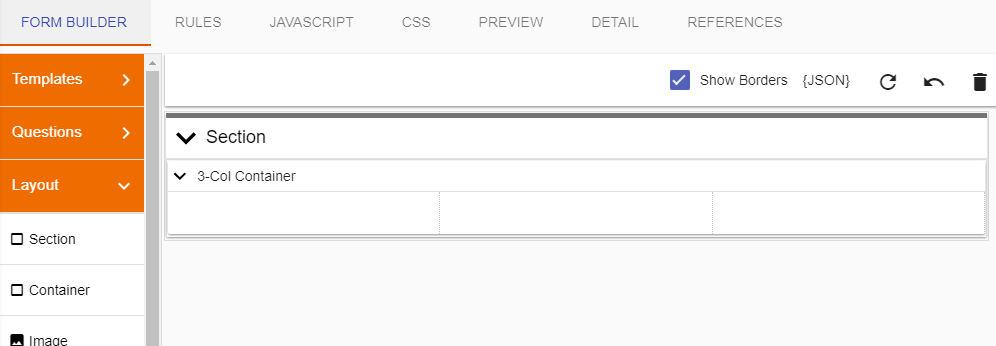
You will now see the additional columns outlined in grey inside the container.
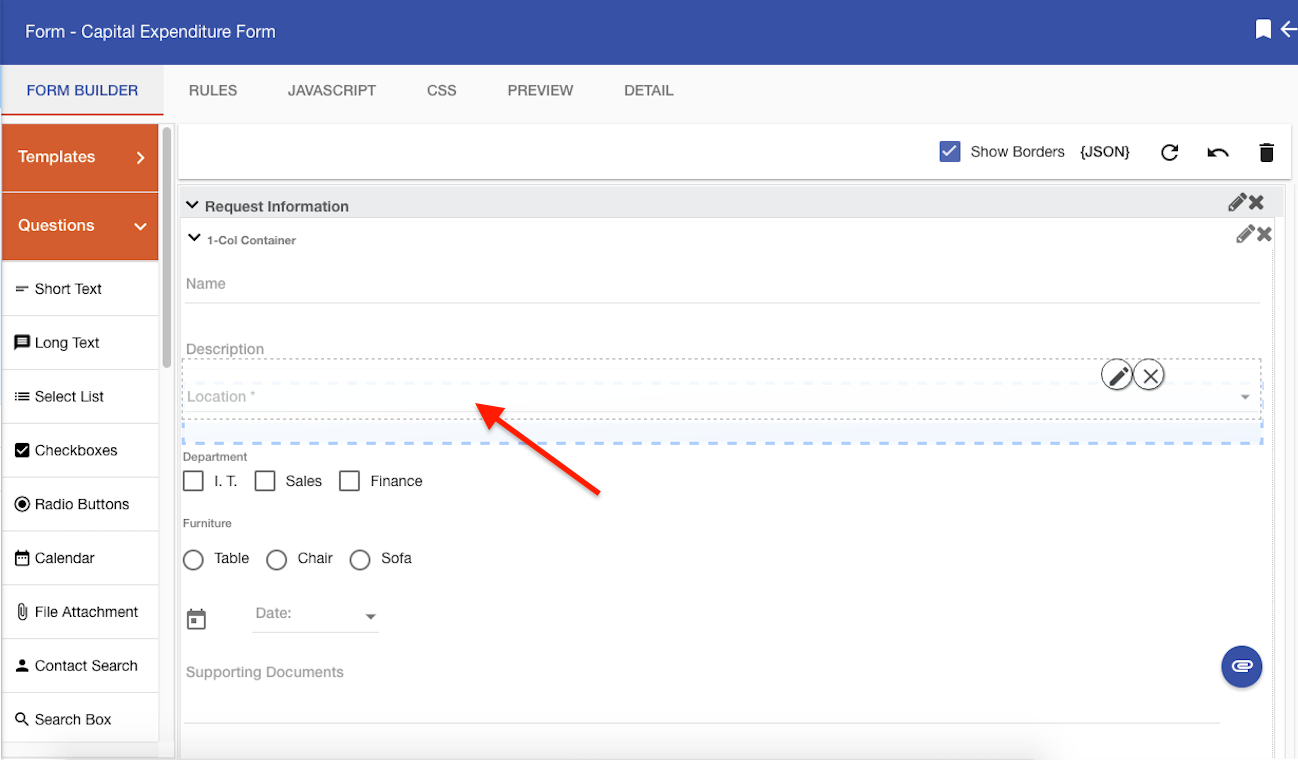
You may add questions at any time by dragging and dropping them inside a container or a column within a container.
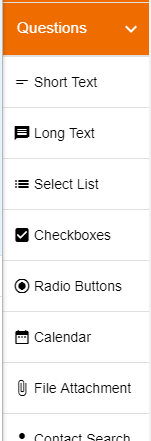
The Questions menu displays a list of all questions that can be used on your form. From within the form, questions can be added, removed, and or edited.
Once the questions are added to the form, they can be modified by hovering over the question and selecting the pencil icon.
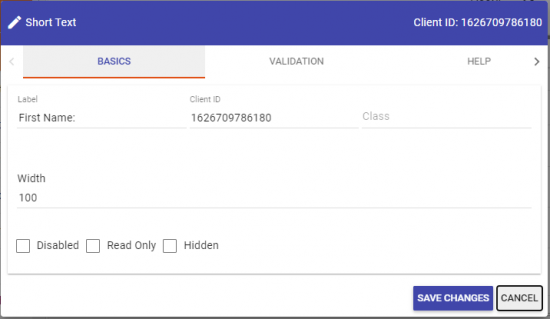
In edit mode, under the Basics menu option, the Label for the question can be modified by first placing the cursor on the Label field and then adding the desired label.
On the bottom left, there are three checkboxes that can be configured to allow the question to be Disabled, Read Only, or Hidden:
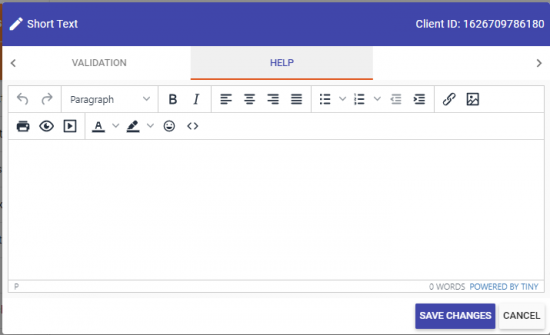
In edit mode, under the Help menu option, Help text can be added which will be displayed to the user via a clickable question mark icon on the form next to the question.
Form Question Types
In the example above, a Short Text question has been selected and this will add a single line, short text input box on the form. The other question types currently supported are:
- Short Text: a single line, text entry field.
- Long Text: a multi-line, text entry field. Typically used for long descriptions.
- Select List: produces a drop-down list of values. The list values may be a static list or bound to a database query.
- Checkboxes: a series of checkboxes. Checkbox values may be a static list or bound to a database query.
- Radio Buttons: a series of radio buttons. Radio button values may be a static list or bound to a database query.
- Calendar: pop-up calendar control to enter dates.
- File Attachment: this field will enable the end-user to browse their local desktop and upload one or more files to the form being submitted.
- Contact Search: a specialized lookup that allows the end-user to search and select one or more contacts in Integrify (or the administrator can configure the question to only return users by a searched group).
- Search Box: creates a pop-up search window that enables a search against secondary data sources.
- Email: a single line, short text entry field. Integrify validates the data entered to ensure that it conforms to an email address format such as janedoe@acme.com
- Number: a single line, text entry field. Integrify will validate the data entered contains only numeric values. Includes the ability to add a currency format to the field.
- Grid: allows the user to create a table of questions within the form. You can add static text as well as predefine the number of columns and rows. More on the Grid Question.
- Rich Text: creates a rich text entry field. NOTE: Embedding large/multiple attachments or images can impact application performance and possibly result in timeouts.
- Link: a single line, short text entry field. Integrify will validate the data entered to see that it conforms to a common pattern such as http://www.integrify.com or c:\\temp\myfile.txt, or \\NetworkShare\myfile.txt.
- Time Zone: presents a list of time zones. Generally used to update the profile information for an Integrify User.
- Password: creates a masked password entry text field with a secondary confirmation password entry text field. Integrify will validate that the passwords match. Most commonly used on a custom user profile update process.
The following are Layout related objects that can be dragged and dropped onto the form for formatting purposes:
- Section: Allows the end-user to divide a form into specific sections.
- Container: Used to group questions together in a specified area within a form. A container is first added to a form then questions can be added to the container to maintain the grouping.
- Image: This is used to upload images directly to a form. Supported file types include: .tiff, .pjp, .bmp, .gif, .svg, .png, .xbm, .dib, .jxl, .jpeg, .webp, .ico, .tif, .pjpeg, .avif.
- Horizontal Line: Used to format a form by providing a visual border separating one area from another.
- Form Text: Allows you to define a read-only label field in your form. Once you add, go to edit for the question type, then Default Text to add your content.
- Blank Space: Used to add spacing between questions.
- Button: Used to add a blank button to the form. You will need to use javascript to provide actions for the button.
- Custom: Allows the end-user to add additional functionality such as field calculations via code.
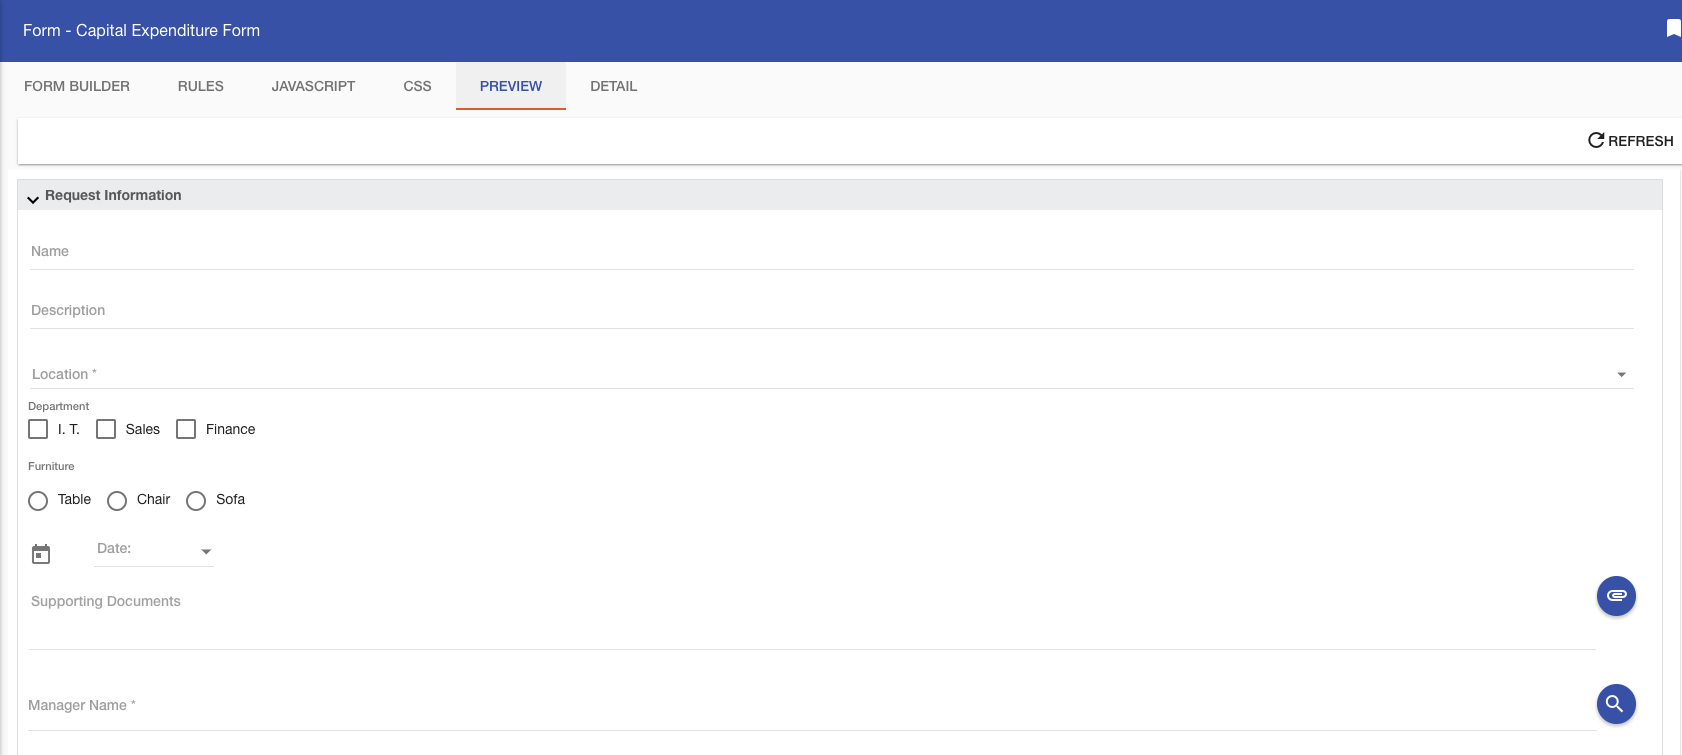
After a question has been added, it will appear on the form within the Form Builder. Select the Preview tab to see how questions render on the form during runtime.
If multiple questions are added to the form, they may be reordered by simply dragging and dropping them to the desired location.
An indicator will appear stating that you have successfully grabbed a question to re-order. Simply move your cursor to the new location in the grid and release.
Note: The re-order of questions will impact how the question information is eventually displayed in the Request Detail. It will also impact the default layout of a form prior to any edits to that layout. If you have made changes to the default layout of a form and then re-order your question list, it will not alter the form layout again. It will only be reflected in the Request Detail display of that form data.
Once the questions are added to the form, they can be either edited or deleted. To edit the question, select the Pencil ![]() icon. This will display the configuration window where edits such as the question label, help notes, maximum field size, database query & connections, etc. can be made.
icon. This will display the configuration window where edits such as the question label, help notes, maximum field size, database query & connections, etc. can be made.
To Delete the question, select the "X" icon and the question will be deleted.

Adding additional fields or modifying the Client IDs (making them different than the Field IDs) to an existing form:
When additional fields are added to an existing form or Client IDs are modified on an existing form within an existing process, the new or modified fields need to be imported to the form via the process task configuration.
See the following:
Add an additional field to the existing form or modify a Client ID.

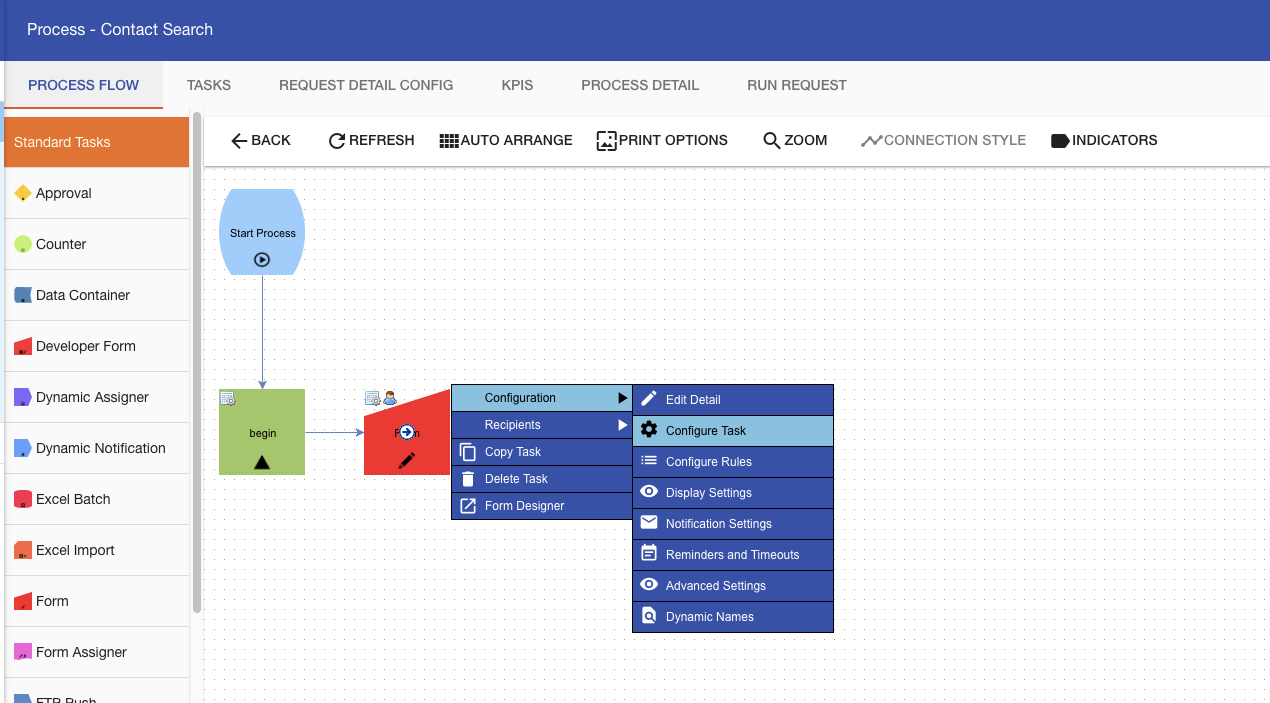
View the existing process and on the Form task, open Configuration > Configure Task.
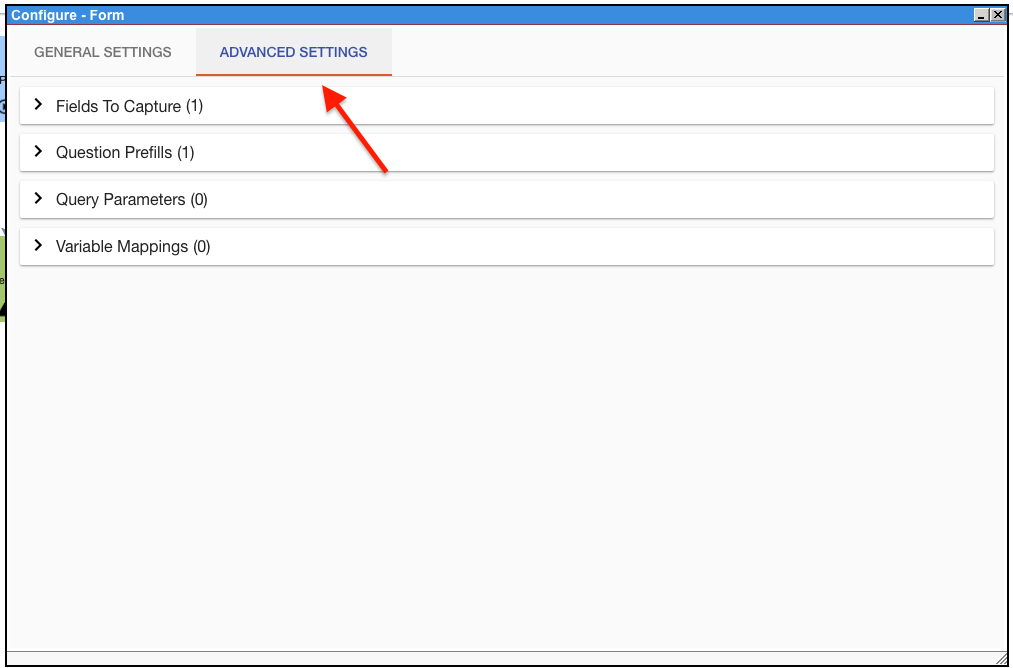
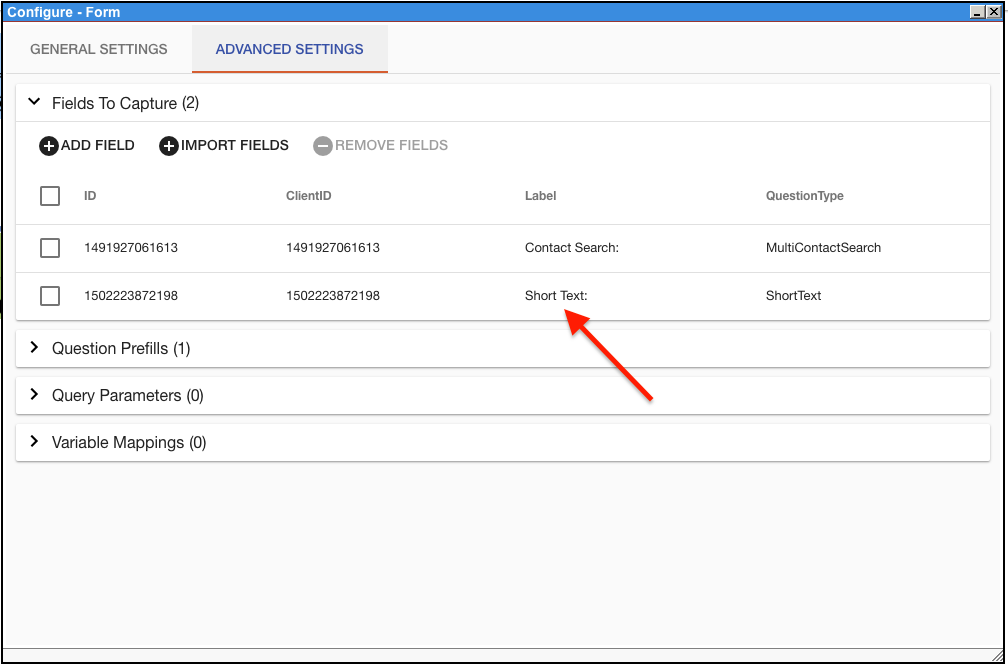
Select the ADVANCED SETTINGS menu option.
Open the Fields To Capture section and click on the IMPORT FIELDS option to update the form fields.
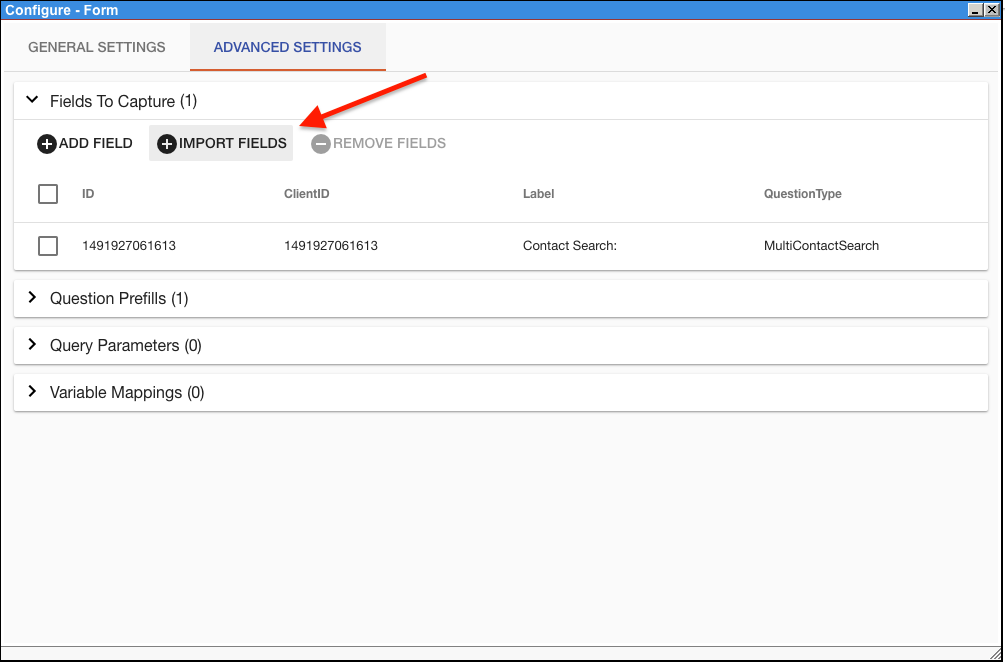
Confirm the additional field has been added.
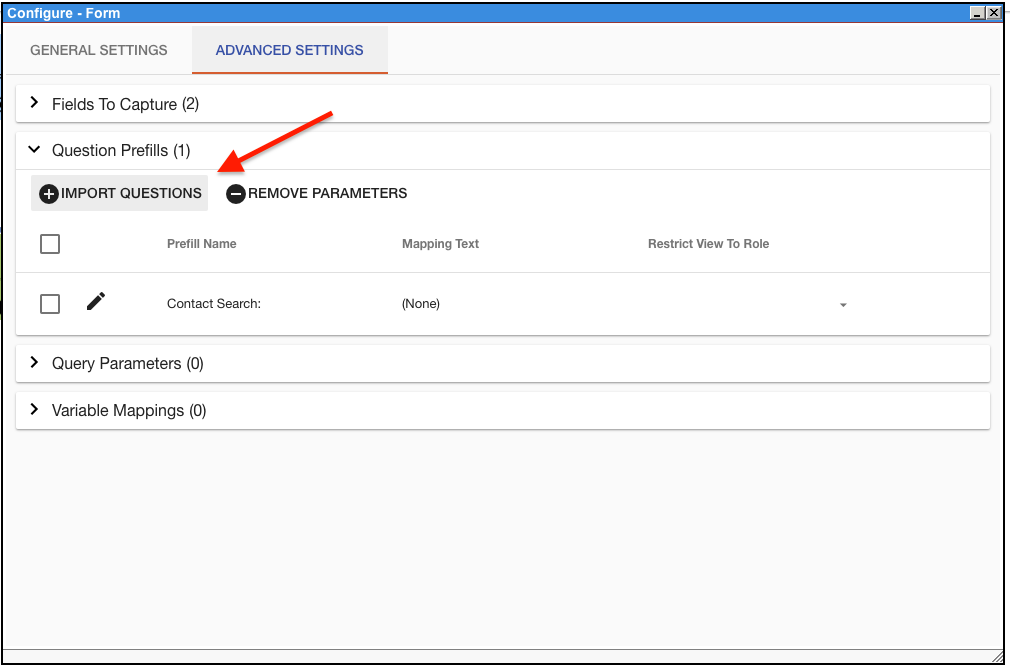
Open the Question Prefills section and click on the IMPORT QUESTIONS option to update the form fields.
Confirm the additional field has been added.
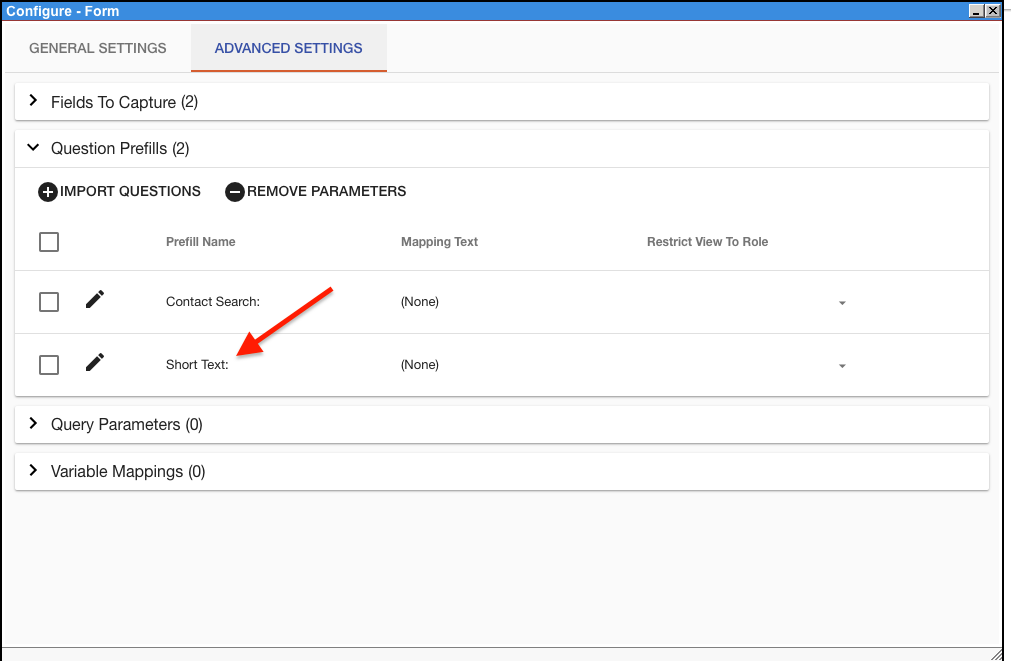
Once confirmed the process is complete.
This process must be done every time an additional field is added to an existing form.
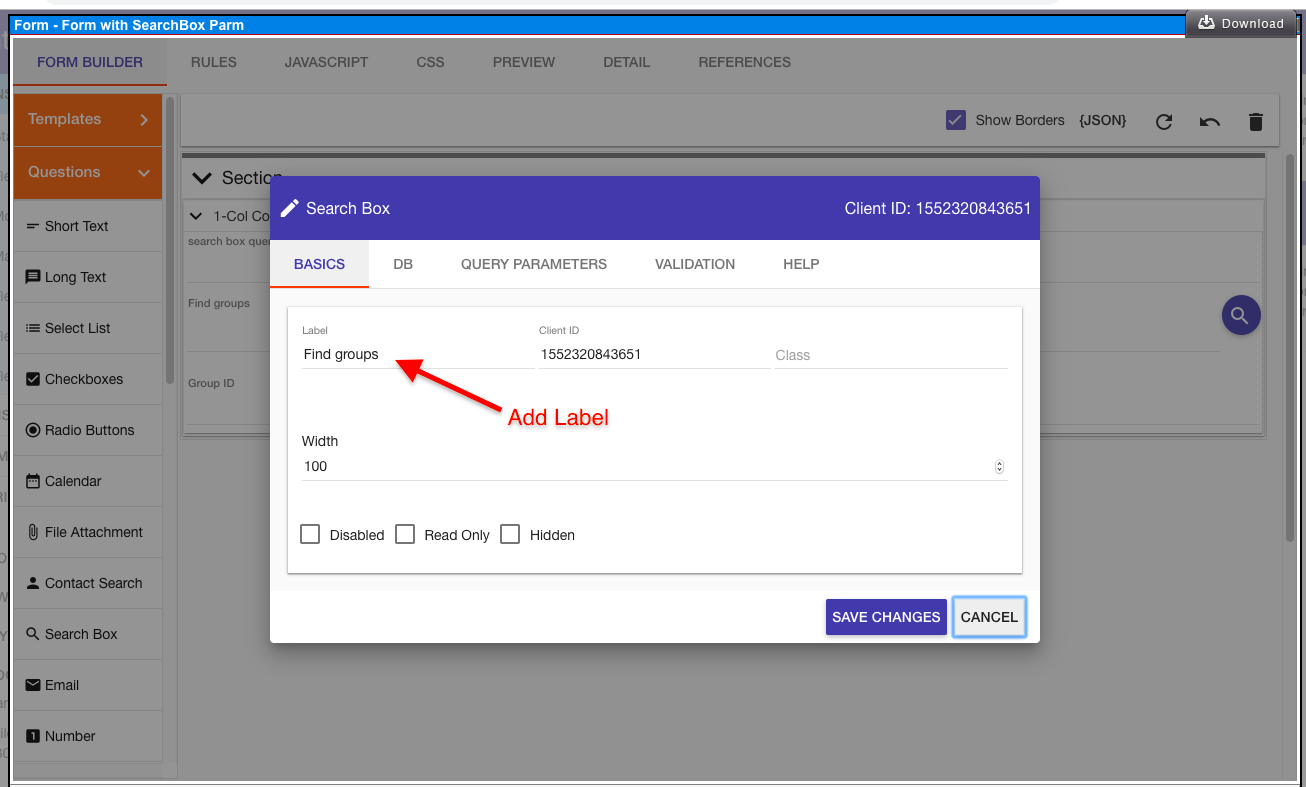
The following is an example using the Search Box question.
Add a Search Box to a form and Label it then Click on the SAVE CHANGES button.
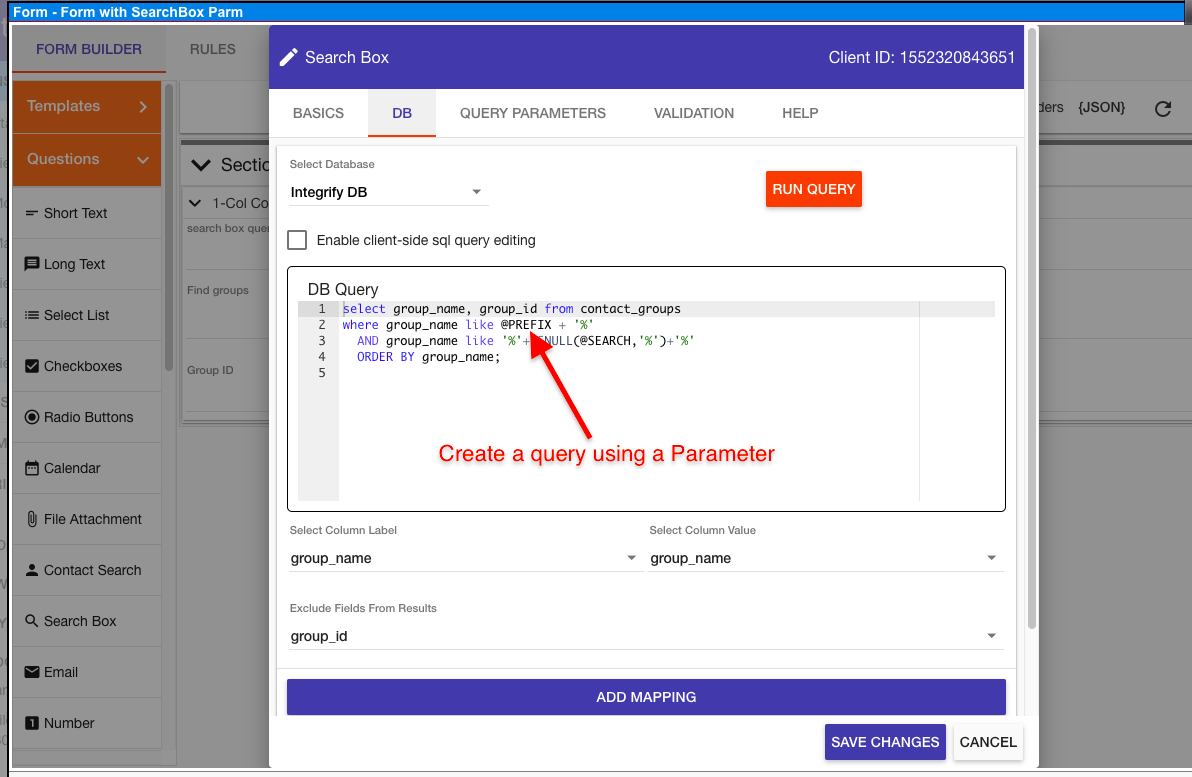
Next Select the DB Menu Option and enter a Query with a Parameter reference and then Click on the SAVE CHANGES button.
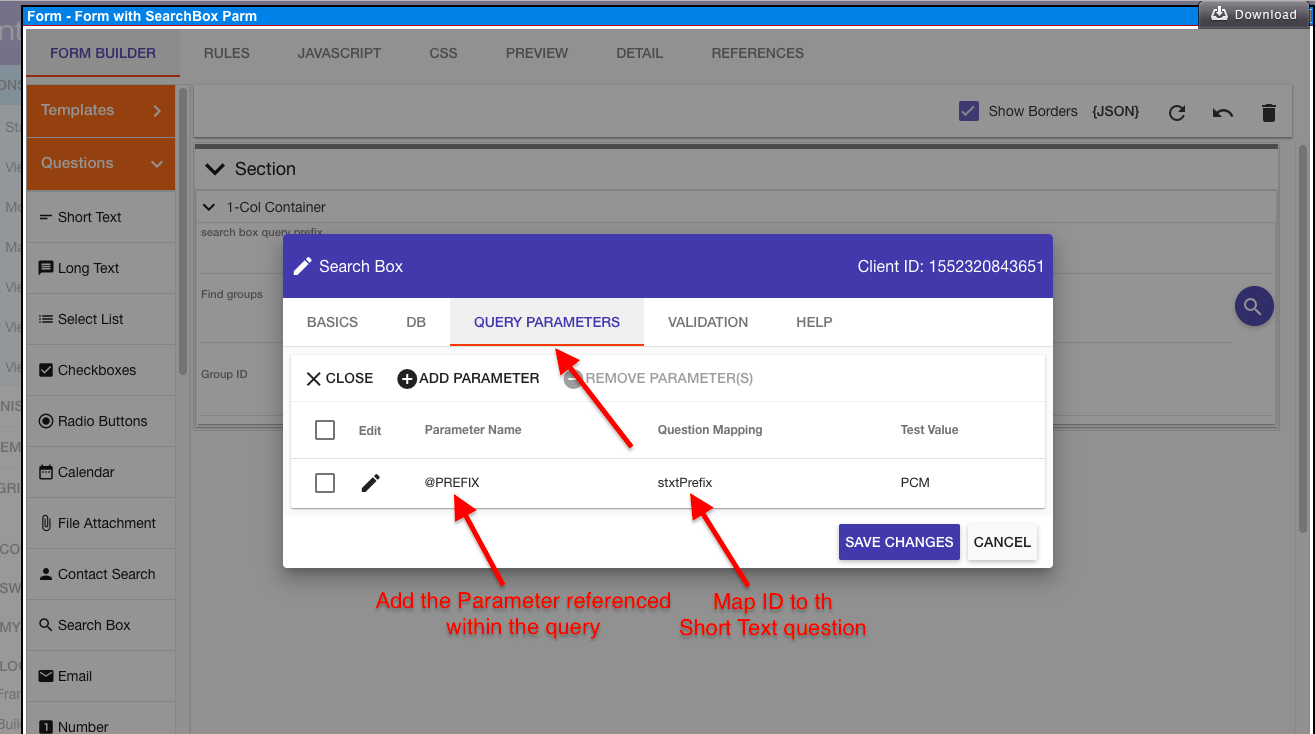
Add the Query Parameters by selecting the QUERY PARAMETERS menu option.
Click the ADD PARAMETER sub-menu option and add a Parameter Name using the '@' symbol and Question Mapping then Click on the SAVE CHANGES button.
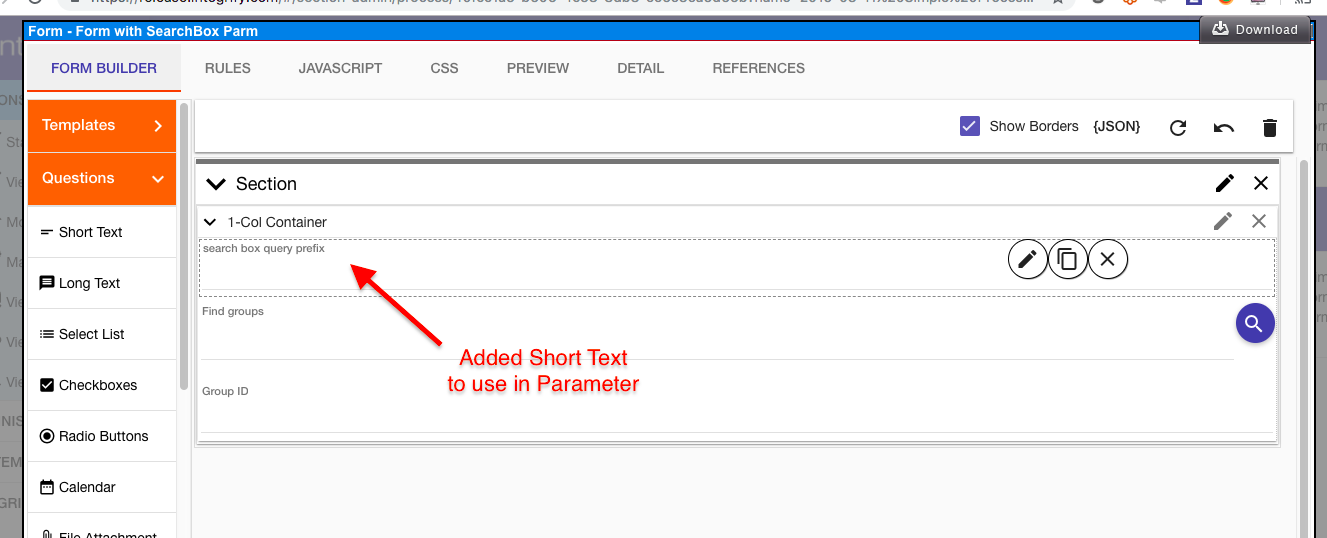
For this example, we added a Short Text question to the form that is used as a Mapped Question within the Query Parameter.
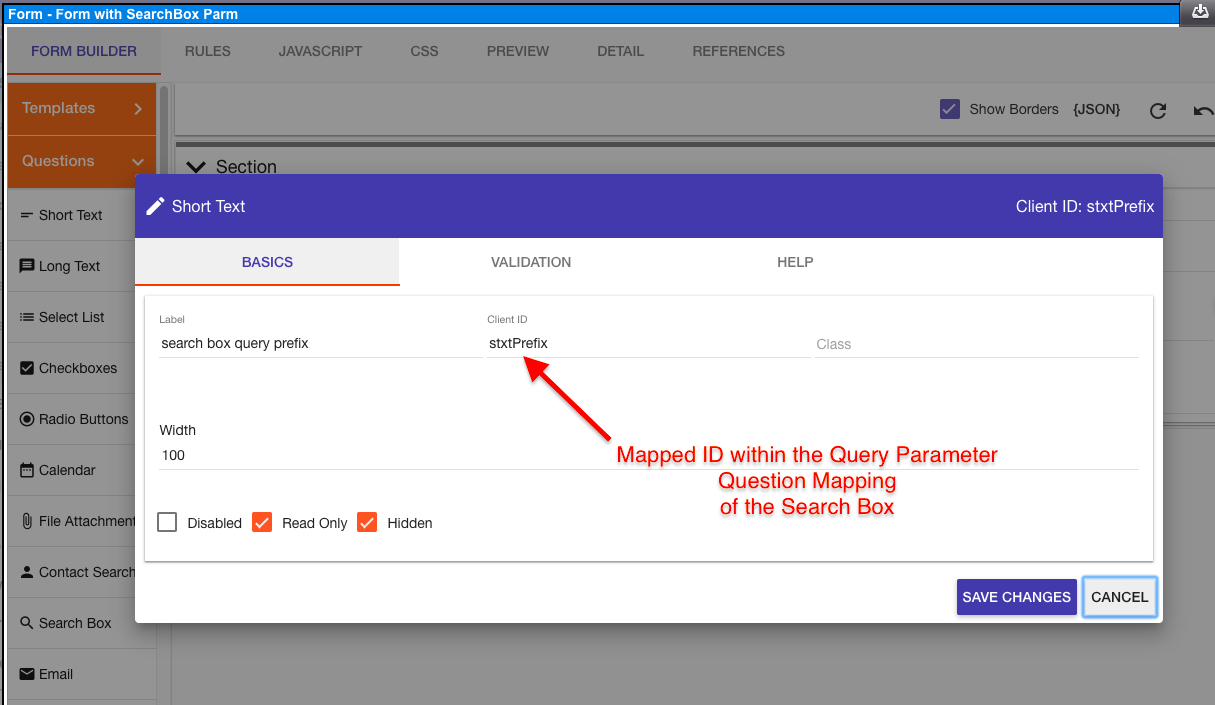
Enter a Client ID that will be configured in the Query Parameters Question Mapping.
Once the added Search Box question and Parameters are configured, the Search Box question is ready for use.
This process must be done every time a Search Box question with Parameters is added to a form.