Using the Grid Question
The Grid question (sometimes called the "Line Item" question) is used when you need to create a table, or list, for users to enter a series of text or numbers. One example would be a list of items along with associated information, for instance in an expenditure request.

To create a Grid question, drag ![]() the question from the question palette and drop it into a container. You can immediately add a label for the Grid, or you can click the edit pencil icon on the right and add a label when you begin configuring the grid
the question from the question palette and drop it into a container. You can immediately add a label for the Grid, or you can click the edit pencil icon on the right and add a label when you begin configuring the grid
Configuring the Grid
When you hover over the grid, clicking the edit Pencil icon will open the Grid Configuration window.

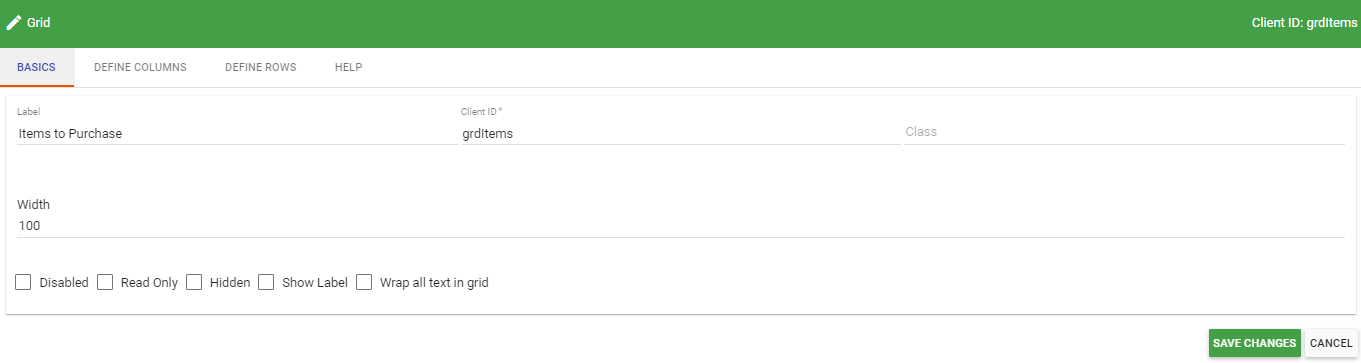
On the Basics tab, you can configure:
- The Grid label (shown above the grid on the layout)
- The Client ID
- A CSS Class
- The Grid width (by default the grid will fill 100% of the container it's in)
- Whether the grid is Disabled/Enabled
- Whether the grid is Read-Only
- Whether the grid is Hidden or Shown by default
- Whether the Label will show above the grid
In the Define Columns tab, you configure the columns you want in the grid.
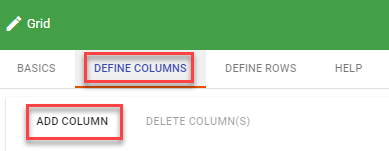
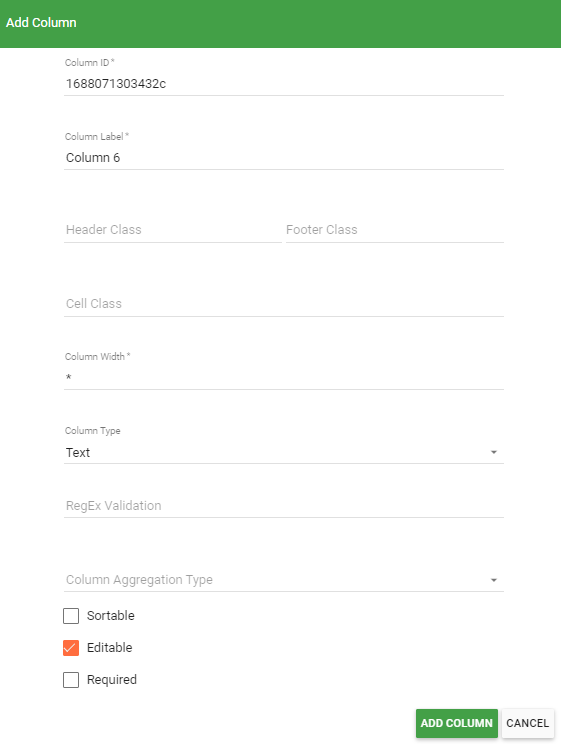
In the Add Column window, you can configure:
- The Column ID: this acts similarly to the ClientID of a question as if you are referencing it in JavaScript.
- The Column Label (column header)
- Any CSS style classes
- The column width (the default, indicated by an asterisk, is to distribute the columns evenly)
- The Data type (text, static text, number, date, boolean, attachment). Note that "Static Text" allows you to add persistent text that cannot be edited in the column)
- Aggregation Type (used for calculating a value including Sum, Average, Row Count, Min, Max). This will display in the footer of the grid. Note: You need to check "Show Footer" in the "Define Rows" tab to make the calculation visible.
- Editable-Check if you want the user to be able to edit the data directly in the grid. Note: Even if this is not checked, the value can still be entered into the Add Row dialog.
- Required/Not Required (Note that if you require a column, ALL pre-rendered rows in the grid must be completed, including unused rows.
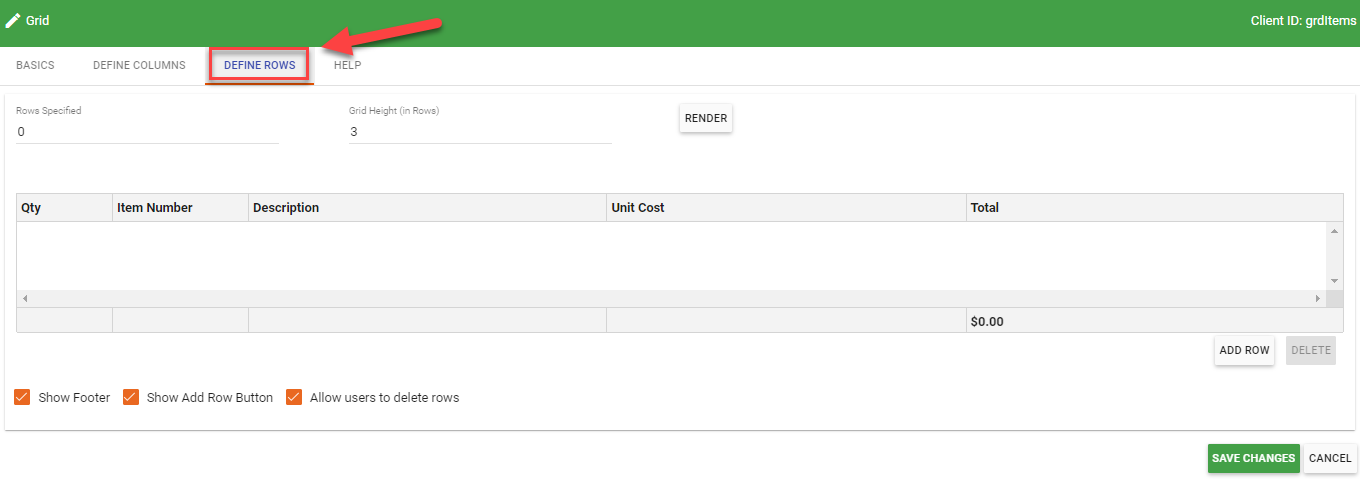
In the Define Rows tab, you can indicate how many rows your grid should have initially. In the "Rows "Specified" field you indicate how many rows should be shown initially. Configuration here is optional and is only used if you want to pre-define a number of rows in the grid.
- How many rows your grid should have initially. In the "Rows "Specified" field you indicate how many rows should be in the grid.
- In the "Grid Height" field you indicate how rows you want the grid to show at one time. If you indicate a height that's taller than the number of rows specified there will be blank space at the bottom of the grid. Alternatively, if you indicate a height that's shorter than the number of rows in the grid, a scroll bar will automatically be added so the user can scroll down to the hidden rows.
- For columns that are defined as "Static Text", you can click on the individual cells and add the desired text from this view.
Note: Make sure to click the "Render" button to generate the grid before saving.
- Check the "Show Add Row" button if you'd like users to be able to add additional rows to the grid. This will add a button for users to insert additional rows in the grid. See below:

Users will then be provided with a dialog box that lets them add data in a new row. The information is presented vertically but the column headings are the same.
- Check the "Show Footer" button if you are using the Aggregation Type in any of your columns. This will add a space at the bottom of the grid to show the calculation.
- Check the ‚"Allow users to delete rows‚" to display the DELETE button that allows users to delete rows from the grid.

