Create a New Form
Watch the Video: Introduction to Integrify - Creating Forms
Create a New Form
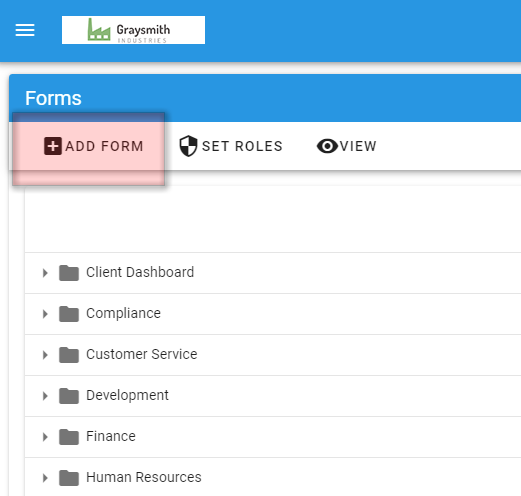
To add a new Form, select Forms > Add New Form from the Administration menu:
You will be presented with a small dialog:
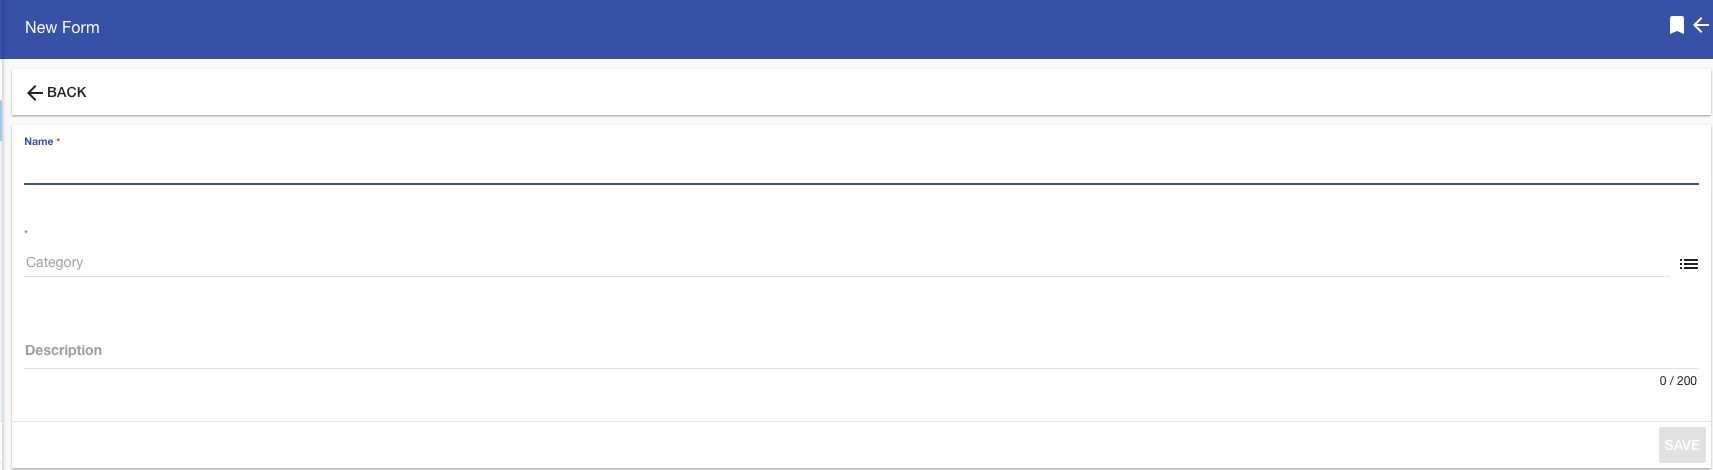
Before a form can be created, you will need to enter data into the following fields:
- Name (required): The name of the form.
- Category (required): The category in which the form will be stored. This category can be different from the category of a process that uses the form. A single form may be shared amongst multiple processes if desired.
- Description (optional): A brief description/purpose of the form. By default, this is added to the form layout but may be removed later.
Once the information has been added, select Save. After a form has saved, a new tab containing your form detail definition will open in your Workspace:
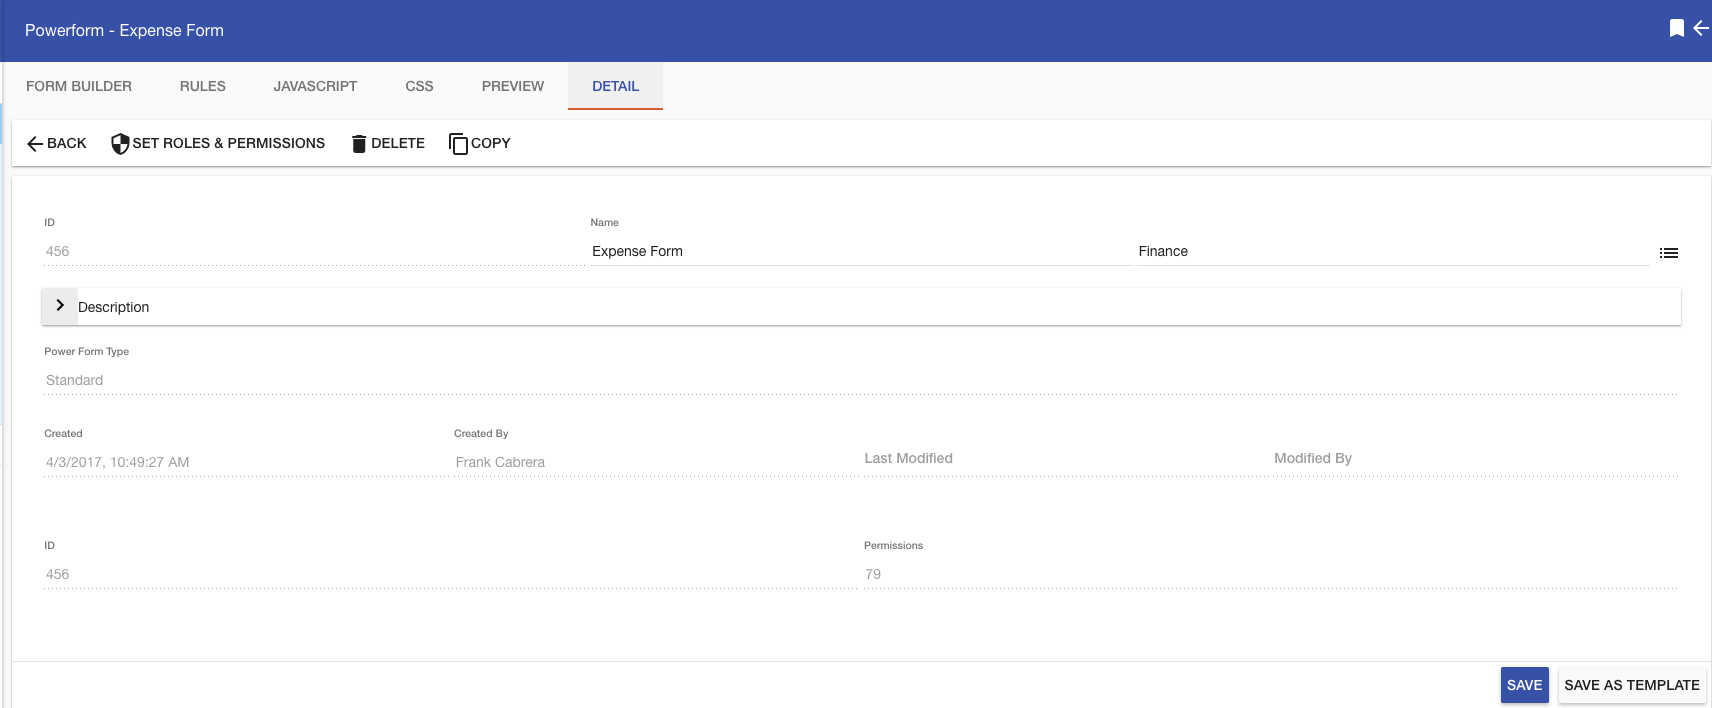
The form definition tabs contain six primary areas:
- Form Builder: Allows the Form Designer to add/configure/remove questions from the form as well as to format and create sections (See Creating Form Questions).
- Rules: Allows the Form Designer to add conditional behavior to questions based on values of specified fields using a menu-driven-like wizard.
- Javascript: This allows the user to create additional coded functionality to heighten the behavior of the form for a more specific granular effect such as parsing out numeric data for calculations.
- CSS: Within this area, the user can add styling/formatting to a form to provide a more customized appearance.
- Preview: Allows the user to visualize what the form would look like during the run time of a process.
- Detail: basic information about the form such as name, category, and description.
On the Detail tab, any items highlighted in black may be changed. If you would like to change the name of the form, just place the cursor on the Name field and delete or modify the current Name.
After the Name has been changed, press the Save button.
If you would like to change the Category where the form is stored, place the cursor on the Category field and select the new category from the list provided.
Note: Even if a form has been created and is associated with one (or many) processes that are currently running in Integrify, changing the Category does not impact how a process functions. It will simply change the location where the form is stored in the system.
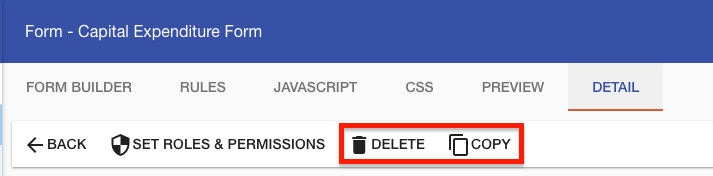
You can also choose to make a copy of a form by selecting Copy or delete a form by selecting Delete:
If you're ready to create a form approval workflow or any other kind of workflow, visit our Create a Process guide.