Developer Form
With the Developer Form task type, you can design pure HTML or HTML5 forms, use unfiltered JavaScript, include script libraries, and define your own CSS styles. This is useful when you require full control over the look and feel of the form. There are separate data entry and view-only settings that can be configured independently giving you the ability to format the data that is captured as desired. Unlike standard Integrify forms, the Developer form is configured only in the Task Configuration menu. They cannot be re-used across multiple processes as Powerforms are, but you can copy and paste the code as needed between process task definitions.
Please download and import our sample process containing a Developer Form for reference. Sample Developer Form (JSON). (Right-click on the link and save the file to your computer.)
Developer forms have different Form Code and View Only Code sections, so be sure to review both sections for each form type example.

There are 4 configuration tabs on one for testing your configuration:
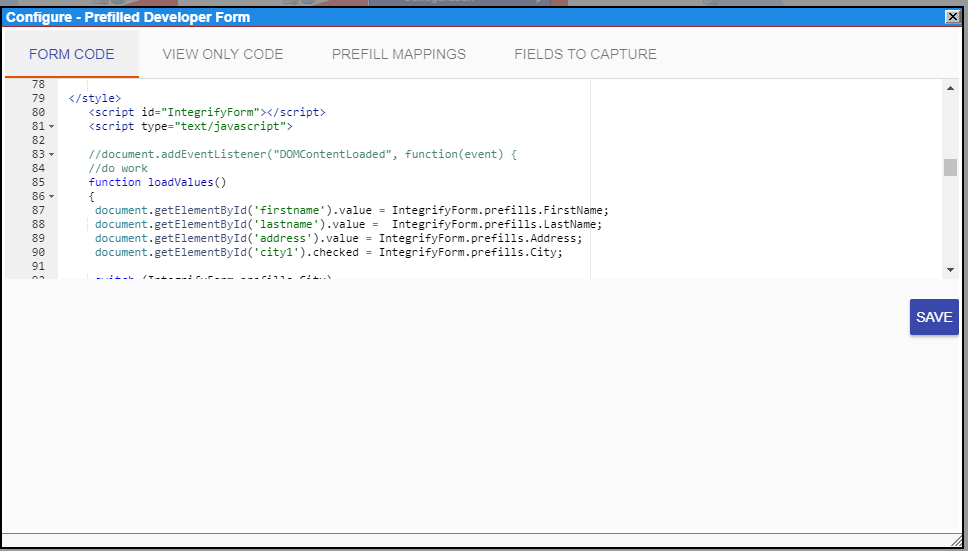
Form Code
This setting will accept a HTML/HTML5/Javascript:
- Type or paste in your code
- For a regular form post, simply leave the action attribute out of your FORM element.
- Optional: You may place a script tag as follows in your form - <script id="IntegrifyForm"></script>. This will get replaced when the form runs with a script containing some helper code and a variable called task which you can use in your JavaScript code. In addition to the helper functions, the IntegrifyForm object includes a Prefills property which is a JSON hash of the key/value pairs specified in the prefills tab.
The complete code for this example can be retrieved by importing the process export file linked above.
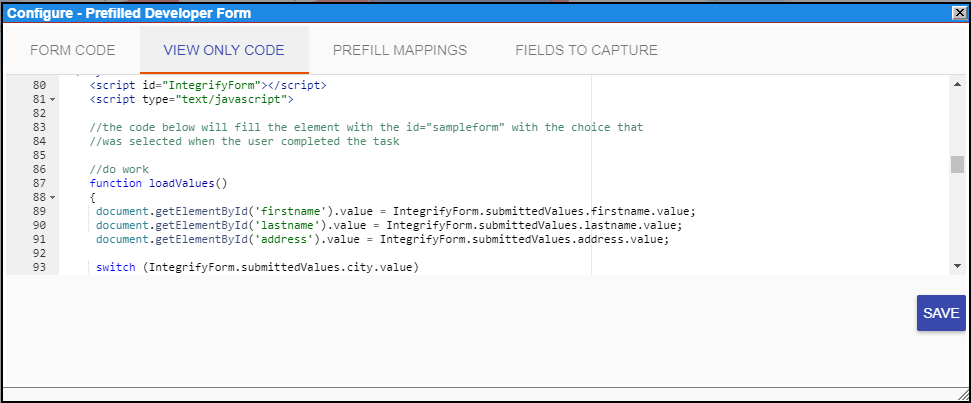
View Only Code
The View Only Code tab allows you to specify the display HTML used when viewing a form that has been submitted from the Request Summary. You will need to use JavaScript to place the values that were submitted into your HTML layout. To accomplish this we use the following conventions:
- Place a script tag as follows in your form - <script id="IntegrifyForm"></script>. This will get replaced when the form runs with a script containing a variable called IntegrifyForm which will have a submittedValues property containing the key/value pairs that were captured when the form was submitted:
The complete code for this example can be retrieved by importing the process export file linked above.
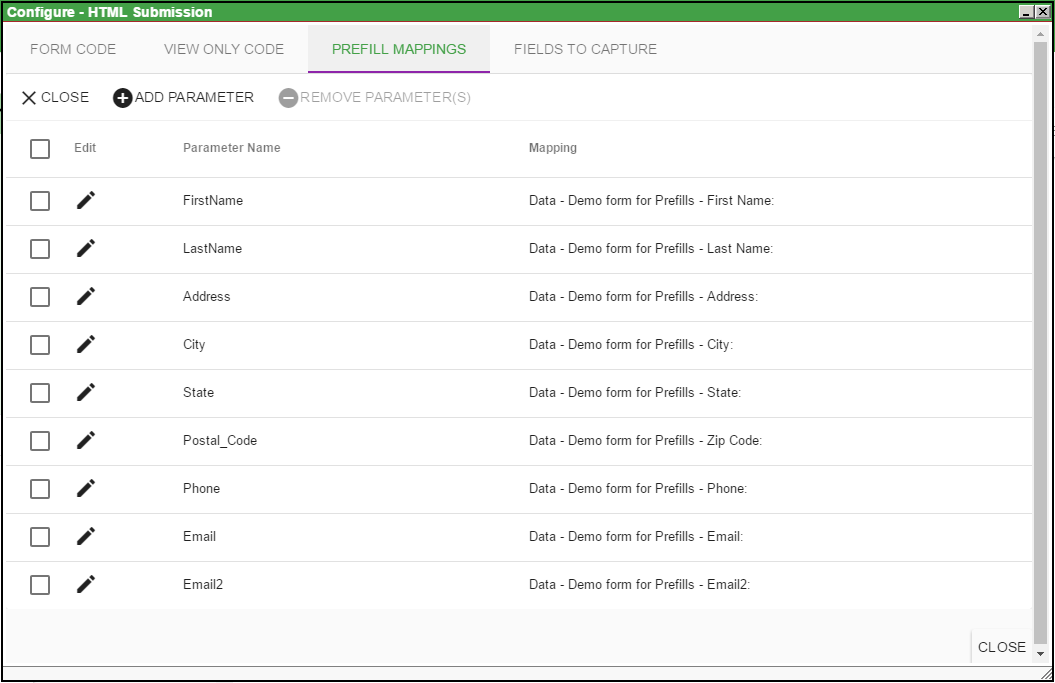
Prefill Mappings
The Prefill Mappings tab allows you to define values from the process that will be inserted into your Form Code (see above.) :
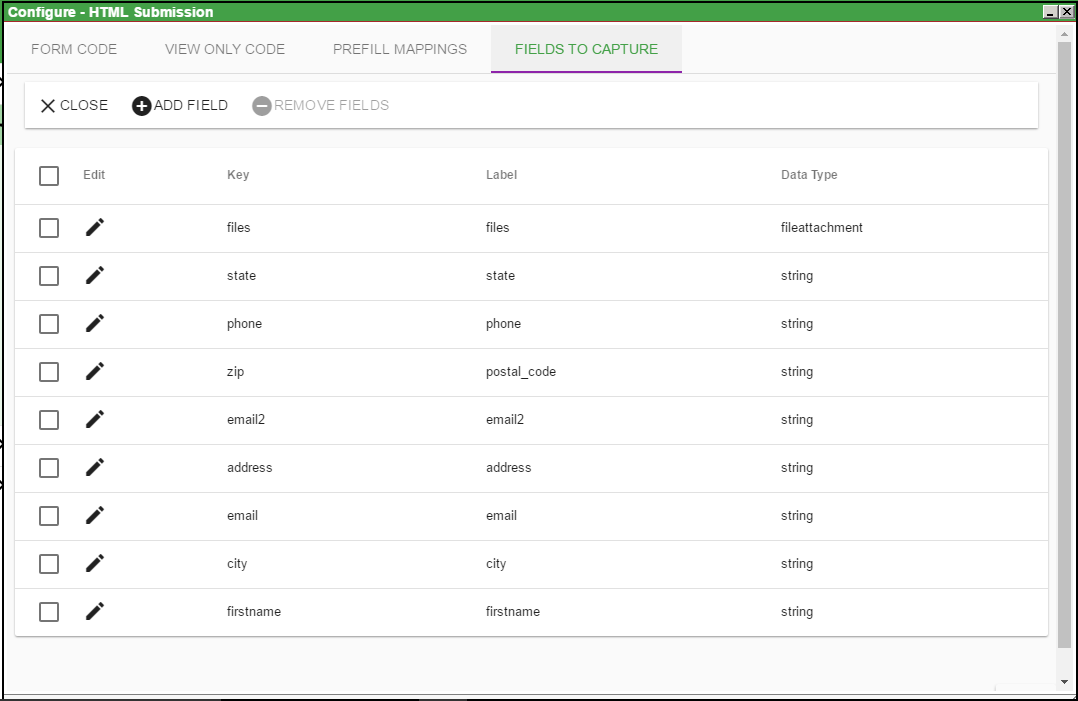
Fields To Capture
The Fields To Capture tab allows you to define which form fields are captured when they are posted. These fields are then exposed to the process for rules and prefills and are also exposed to the Integrify reporting engine.
- Key Name: this should match the name attribute of the field in your HTML (ex: <input name="email" type="text>)
- Label: this is the label that will show in the Task History, Rules, and Reports.
- Data Type: This sets the data type that controls the configuration options for Rules and Reports