CSS Styles in Forms
Overview
Integrify's form formatting follows Google's Material Design standards, which is common for mobile and Web standard forms. However, there may be cases when the default format of forms does not suit your organization's needs.
This could include elements like fonts, font sizes, colors, backgrounds, spacing, etc. With Integrify you can customize these elements using CSS, or Cascading Style Sheets.
If you don't know CSS from SOS, using our CSS editor can be a tough hill to climb. To help you jump into CSS more easily, we've put together a guide for using CSS in Integrify forms.
We also supply some sample CSS code you can drop in to make an immediate impact as well as links to more CSS reference material that will help you along.
What Is CSS?
CSS or "Cascading Style Sheets" is a centralized way of managing how different elements appear on a page. For instance, you may want all the headings to look the same way on your Web site so you define how "Headings" look in one place and then every time you want to add a heading you use the "Heading" style.
The same concept can be used in Integrify forms, using the CSS Panel in our Form Builder. Using the CSS Panel you can define styles for some form elements to achieve a certain look. For instance, changing the color and weight of labels or changing the borders of fields.
The CSS Panel

To access the CSS panel, go to the Form Builder and click on the CSS tab. It will normally be blank to start but we've added some CSS code in the example above.
To create CSS styles you first define a "class" which is a name for a specific style. To create a class in the CSS panel, you would type a "." plus whatever relevant name you want to use. For instance, if you wanted a class that made fonts black instead of the default grey, you might name the class ".fcolor-black."
Once you've created the class's name, you have to define its appearance. There are a variety of changes you can make to fonts for instance. In this case, we just want to color the font black. With CSS, you simply say what you want to change (font-color) and what you want the change to be (black). It would then look like this:
.fcolor-black {color:black;}
Punctuation is important when writing CSS code. Note the brackets, the colon, and the semi-colon. These all need to be used as shown. Don't worry, we have some sample CSS code you can steal later in this article.
To make sure that your style overrules any other styles that might be set by the user's browser or a page your form might be on, you can add "!important" to the class definition. It would look like this:
.fcolor-black {color:black !important;}
Copy and paste this code into your CSS panel, then save it.
Adding Style Classes to Form Questions
Formatting Question Labels
Now that you've defined your class you need to go back to the form and apply it. To do this go to the Form Builder and select a question to edit. In the question editor you'll see a spot for "Class."
Add the class name you created without the "." in front of it (see the image below).
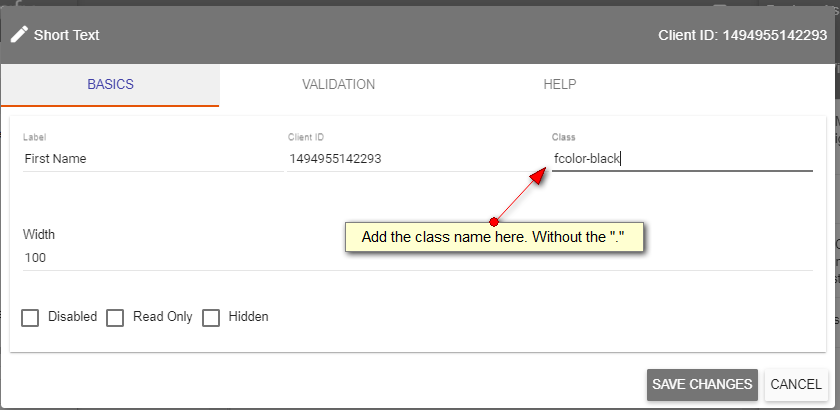
Save the change and switch to the Form Preview tab to see the change. Remember, the changes won't show up in the Form Builder itself. You'll only see the results in the Preview Tab.
Formatting Fields
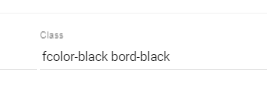
To format the fields in a question you create another class on the CSS panel and add it to the "Class" area in the question editor just like with the question label. Just add a space between the two classes as shown below. In this case, we've created a class called bord-black that makes the border of the field black.
So What Form Elements Can You Change?
Some elements you can change:
- Question text labels (font, color, size, weight, background color)
- Field borders (color, weight, corner radius, padding, icons)
- Buttons (color, borders)
Changing Form-Wide Labels
Text labels can also be styled across the entire form. For instance, if you wanted all the text labels in your form to be larger and dark grey, you can use the pre-existing ".int-label" class like this:
.int-label {font-size:14pt; color:#707070 !important;}
This will change ALL question labels to 14pt and dark grey (#707070 is the Web color for dark grey).
Sample Code to Try
To give you a head start on using CSS in your forms, we've created some CSS classes that you can copy and paste into your CSS tab.
Paste the CSS code below into the CSS panel of your form and then add the classes you want to use to the questions in the Form Builder. Then preview them in the Form Preview tab.
REMEMBER: Punctuation is important. If you don't see a change when previewing, make sure you didn't edit the code and leave something out.
/* Form-Wide Label Formatting*/

/* Change the values to your preferred size and color */

.int-label {

    font-size:15pt !important;  /* Change question label size */

    color:#707070 !important;   /* Change question label color */

}

/* Field-Specific Formatting*/

/* Use your preferred values in the "Class" field of each question. You can use multiple classes for each field. */

.back-grey {

    background-color:#D0D0D0 !important;        /* Change the background color of the user input area.  For Select List it is applied for the entire question */

}

.back-yellow {

    background-color:#FFFCBF !important;

}

.back-red {

    background-color:#ff9385 !important;

}

.fcolor-black {

    color:black !important;                     /* Change user input text color to black */

}

.fcolor-red {

    color:#ff9385 !important;

}

.fcolor-green {

    color:#1ca655 !important;

}

.fsize-12 {

    font-size:12pt !important;            /* Change question label text size to 12 points */

}

.fsize-14 {

    font-size:14pt !important;

}

.fsize-16 {

    font-size:16pt !important;

}

.corner-3 {

    border-radius:3px !important;               /* Change question input area corner radius. For Select List is applied to the entire question */

}

.corner-5 {

    border-radius:5px !important;

}

.corner-10 {

    border-radius:10px !important;

}

.bord-black {

    border:1px solid #000000 !important;    /* Add a solid border around the user input area of 1 pixel.  For Select List border is applied around entire question */

}

.bord-red {

    border:1px solid #ff9385 !important;

}

.bord-green {

    border:1px solid #1ca655 !important;

}

.bord-grey {

    border:1px solid #BFBEBD !important;

}

.bord-dotted {

    border:dotted #8A8A8A 2px !important;   /* Add a dotted border around the user input area of 1 pixel.  For Select List border is applied around entire question */

}

.bord-bevel {

    border-left:solid #BFBEBD 1px !important;           /* Add solid border of 1 pixel in size to the left of the user input area */

    border-bottom:solid #BFBEBD 1px !important;         /* Add solid border of 1 pixel in size to the bottom of the user input area */

}

.icon-email {

    background-image:url('https://www.integrify.com/site/assets/files/2592/email-icon.png') !important; /* Email icon image added via URL */

    background-position:2px 2px !important;             /* Position of background image in the user input area */

    background-repeat:no-repeat !important;             /* Image is not repeated */

    padding-left:40px !important;                       /* Add some space left of the image */

}

.icon-phone {

    background-image:url('https://www.integrify.com/site/assets/files/2592/phone-icon.png') !important;

    background-position:2px 2px !important;

    background-repeat:no-repeat !important;

    padding-left:40px !important;

}

.icon-home {

    background-image:url('https://www.integrify.com/site/assets/files/2592/home-icon.png') !important;

    background-position:2px 2px !important;

    background-repeat:no-repeat !important;

    padding-left:40px !important;

}
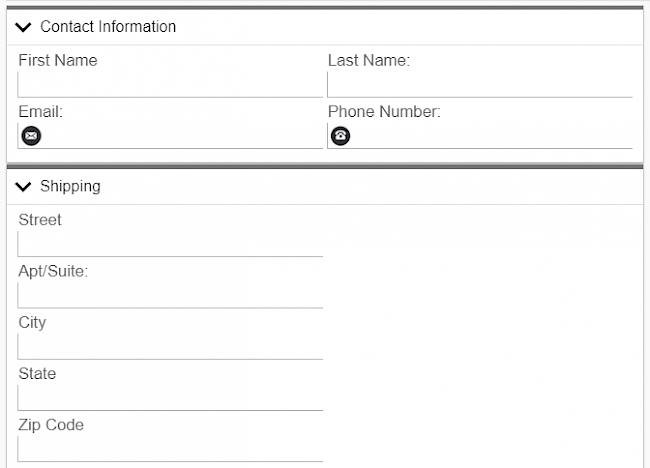
Examples of CSS-Formatted Questions
We randomly applied some styles to this form to give an example of how styled fields can appear.

In this form, we applied a unified style to create a clean form.
Additional Resources
Using CSS Classes
Keep in mind, that not all CSS properties will work with Integrify forms. The basic properties we've shown you in this article are safe to use. You may not have the same results with other, more obscure CSS properties.
https://www.w3schools.com/cssref/sel_class.asp
Web Color Picker
https://htmlcolorcodes.com/color-picker/