What are Best Practices for Testing in Integrify?
Testing a new process is a critical step in your Integrify implementation. To make the testing process easier, Integrify includes a "single instance promotion" feature that eliminates the need to set up multiple instances for Development, Testing, and Production (however, if desired, additional instances can be added to your account for an additional cost).
Testing a New Process
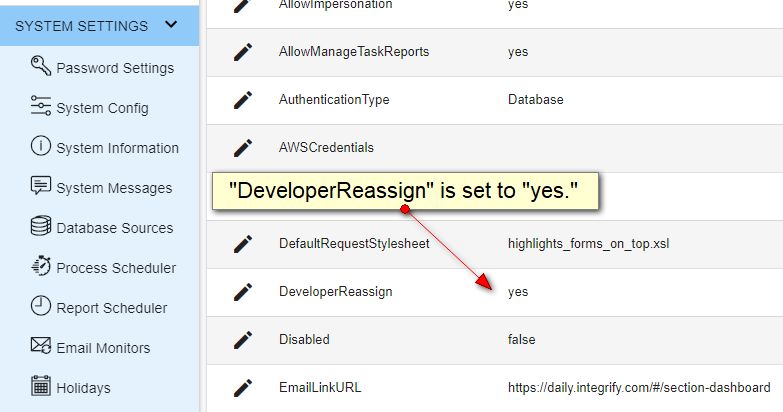
- Go to "System Settings" and confirm the DeveloperReassign setting is set to "Yes." You shouldn't need to change this setting again. When set to "Yes," Integrify will automatically assign all tasks to the requester for any processes in "Development Status." This is a way for a developer to test out their processes without notifying the actual end-users assigned.
- New processes are put in "Development Status" by default to start.
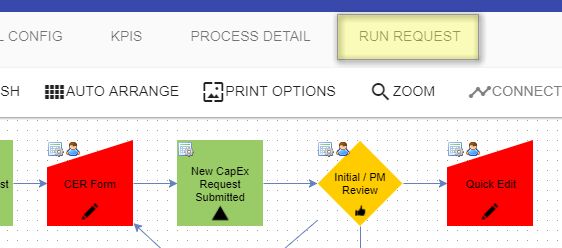
- To begin the first stage of testing, keep the process in Development Status and run the process as if you were an end-user either by launching the process or using the "Run Request" option in the Process Builder. With "DeveloperReassign" enabled, all tasks in the process will be assigned to the Requestor (you) when it's run and you will receive all notifications.
- When you're happy with the process, save it with a status of "Testing Status." This will allow the process to assign tasks to the actual people you've assigned in your process, however, the data will be saved as "Testing" data, separate from "Production" data later. This is helpful because it won't taint future reporting.
- Once you've tested with end-users you're ready to move to Production Status.