Approval Task: Approval by Email
Overview of Approval by Email (Email Action Links)
One of the key benefits Integrify offers is the ability to streamline employee workflow. Email action links (also known as "Approval by Email") allow end-users to take action on an Integrify task with one click in an email.
Note that while we call this "Approval by Email" you are not limited to using it just for approvals. Any action that an end-user might take to complete a task by selecting an option is viable. It just depends on how your process is set up.
Approval by Email Configuration
Confirm ServiceURL Configuration
Before using "Approval by Email," make sure that you have the Service URL defined within the System Settings. From the upper-right corner click on the System Settings gear icon -> System Settings -> ServiceURL.
Click the Edit (Pencil) icon to open the edit dialog box and enter/update the serviceURL as needed.
Public Cloud customers will need to use their vanity root URL for this setting (example): https://companyname.integrify.com
Configuring the Approval Task
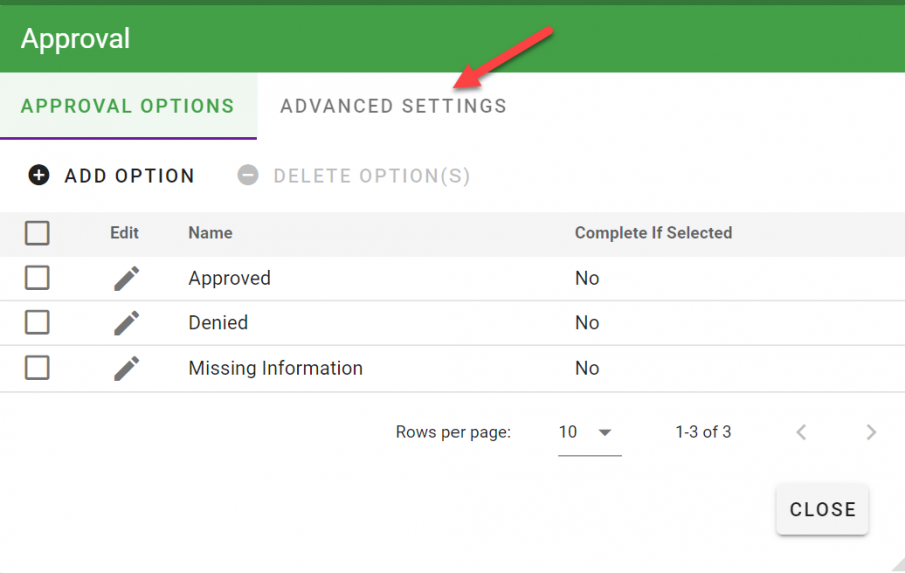
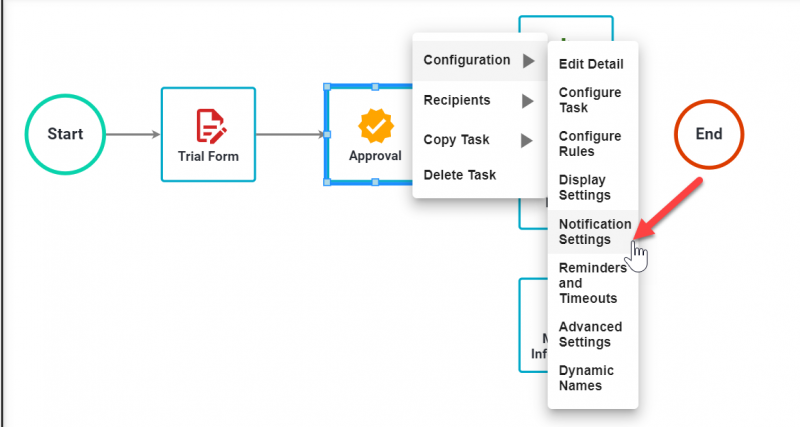
When configuring the Approval Task that you want to allow recipients to complete by email, go to the Approval Task within your process and select Configure Task from its task menu. As you see below, we've already set up some options for the end-user to select.
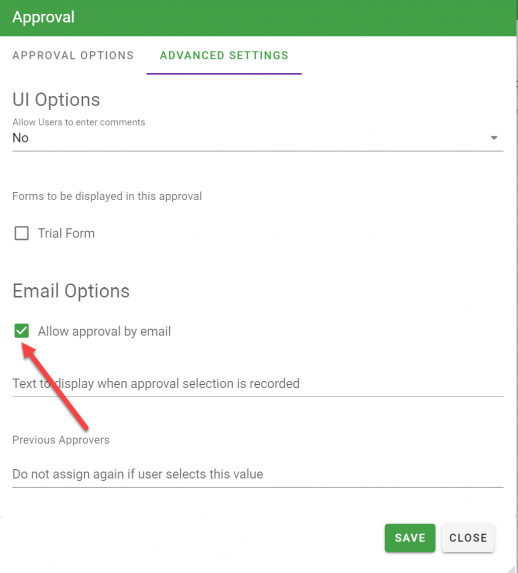
Select the Advanced Settings tab and select the slide button for the Allow Approval by Email option under the Email Options section. Select 'Save' to save your configurations.
Setting up the Notification Email
Next, select Notification Settings from the Approval Task's task menu:
This will open the Notification Settings editor. You will now need to insert links to the choices from your Approval Task into the email that goes to the recipients of the task.
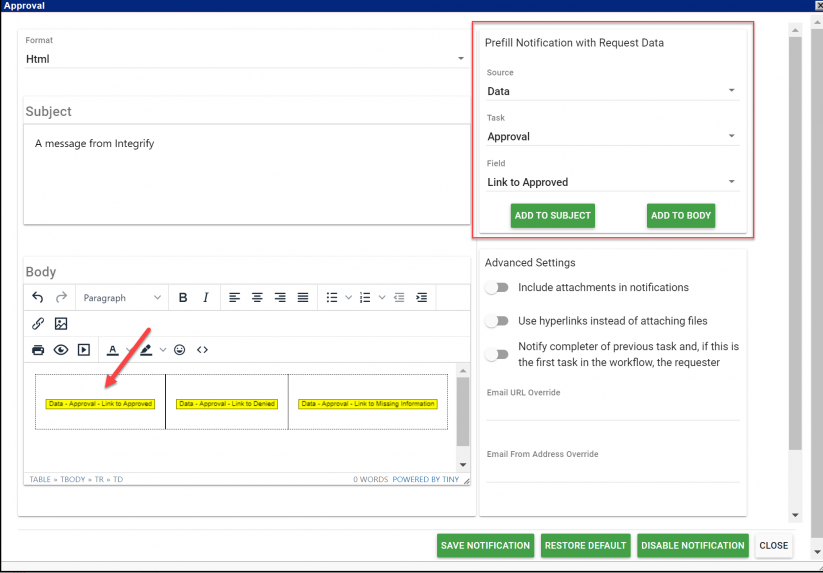
As shown above, on the right panel, under Prefill Notification with Request Data select "Data" as the Source, and then, under Task select the current approval task. Under Field select the field you want to insert into the email notification as a clickable link, then click the "Add to Body" button. The field will appear at the bottom of the email editor window. You can then copy and paste it where you'd like it to display.
NOTE: If you are using an HTML formatted email, both the label and the field will display in the email for the recipient to select. If you are using the TEXT format option, you will also need to type in the field labels next to the fields that you insert into this email notification so the recipient can see the field label in the email.
An example of the email notification that is sent in HTML format is below:
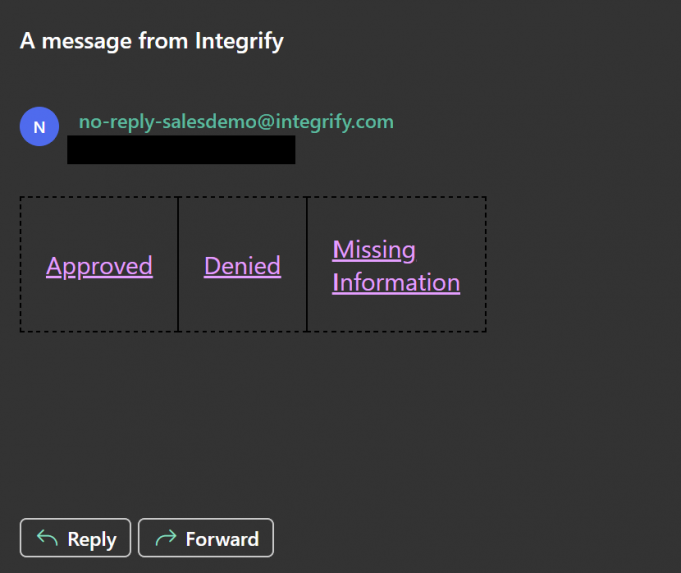
If you are using the HTML display format, you may include tables and other formatting devices to create a pleasing arrangement of the elements in the email and to also make it easier to scan the email quickly for information
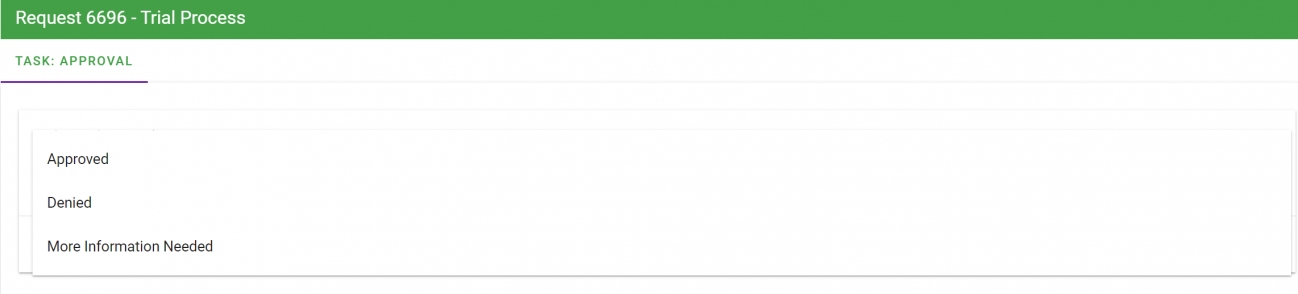
When the recipient selects their choice from the email message (through either their desktop email program or a mobile device such as Blackberry or an iPhone), the task will be updated and a confirmation page will be displayed.
Customizing the Confirmation Landing Page
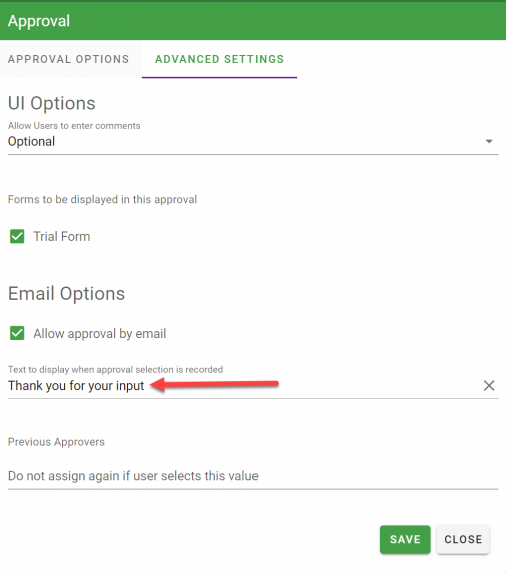
You can customize the message for the landing page that appears once a user makes a selection for their approval task from within their email.
Go back to the approval task configuration screen and click on Advanced Settings.
Enter your message into the field for "Text to display when approval selection is recorded":