Integration Task: Rest Client
With the Rest Client task type, you can configure processes to consume RESTful web services. This task is commonly used to push or pull information for other systems that have a web service API. Technical note: this task type wraps the Request Module for Node.
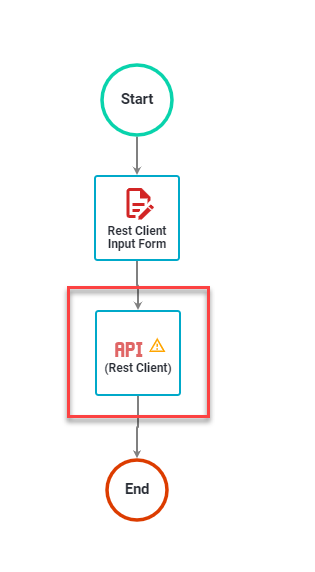
There are 3 configuration tabs for defining your attributes and 1 for testing your configuration:
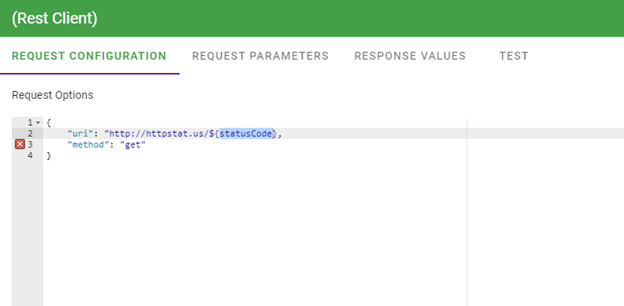
Request Configuration
This setting will accept a single URL/URI string or a JSON configuration object with the following options:
- uri || url - fully qualified uri or a parsed url object from url.parse()
- qs - object containing querystring values to be appended to the uri
- method - http method (default: "GET") - Support all HTTP Verbs (GET,POST,PUT,DELETE etc.)
- headers - http headers (default: {})
- body - entity body for PATCH, POST and PUT requests. Must be a String.
- form - when passed an object, this sets body to a querystring representation of value, and addsContent-type: application/x-www-form-urlencoded; charset=utf-8 header. When passed no options, a FormData instance is returned (and is piped to request). This is the most common way to post a JSON object.
- auth - A hash containing values user || username, password || pass, and sendImmediately. This is not a hash in the cryptographic sense.
- json - sets body but to JSON representation of value and adds Content-type: application/jsonheader. Additionally, parses the response body as JSON.
- followRedirect - follow HTTP 3xx responses as redirects (default: true)
- followAllRedirects - follow non-GET HTTP 3xx responses as redirects (default: false)
- maxRedirects - the maximum number of redirects to follow (default: 10)
- encoding - Encoding to be used on setEncoding of response data. If null, the body is returned as a Buffer.
- timeout - Integer containing the number of milliseconds to wait for a request to respond before aborting the request
- proxy - An HTTP proxy to be used. Supports proxy Auth with Basic Auth, identical to support for theurl parameter (by embedding the auth info in the uri)
- oauth - Options for OAuth HMAC-SHA1 signing. See documentation above.
- strictSSL - If true, requires SSL certificates be valid. Note: to use your own certificate authority, you need to specify an agent that was created with that CA as an option.
- jar - If true, remember cookies for future use (or define your custom cookie jar; see examples section)
- aws - object containing AWS signing information. Should have the properties key, secret. Also requires the property bucket, unless you’re specifying your bucket as part of the path, or the request doesn’t use a bucket (i.e. GET Services)
- httpSignature - Options for the HTTP Signature Scheme using Joyent's library. The keyId andkey properties must be specified. See the docs for other options.
Example:
{url: "https://myservice.myco.com" method: "POST", form: {customer_name: __cname, customer_type: __customertype, active: true}

This example uses the auth, and json options to make a request.
{
"uri": "http://somecompany.com/ws/simple/createProject",
"method": "POST",
"auth" : {
"user" : "MyUserName",
"pass": "123455",
"sendImmediately" : false
},
"json" : true,
"body": {
"customer_type": __customerType
"customer_name": __cname
}
}
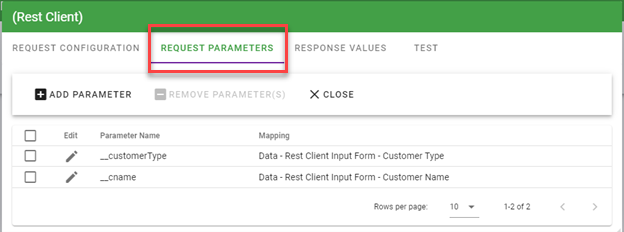
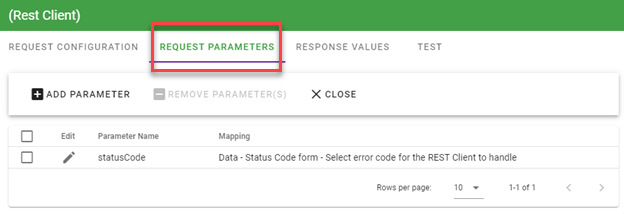
Request Parameters
Request parameters are used to fill variables in your Request Options settings. In the example above, we want to replace the strings __customerType and __cname with variable captured in a form. The screen shot below shows the configuration:
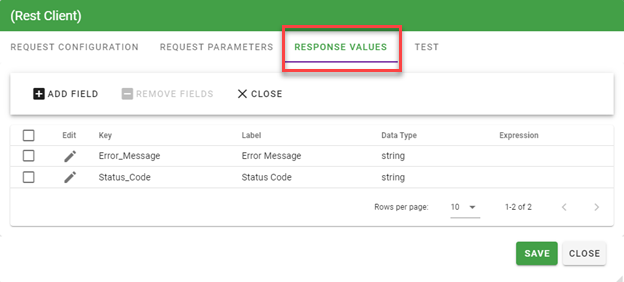
Response Values
This tab allows you to map values returned from the request to task variables. These variables are then exposed to Rules, Prefill values, Reports. When the task executes the values are saved to the database. In the example we have been following, we want to get back the "_id" value from the response of our POST. If we want the entire body of the response, you can skip this tab. The task type allows you to create expressions based on the JSON-Query module for Node. The context is set to the response and the response.body is JSON.parsed. In our example the POSt would return the record for the customer that was saved:
{"__v":0,"active":true,"name":"test customer","_id":"52b353d88bd1a1954c01231b","licenses":[],"users":[],"supportContracts":[],"created":"2013-12-19T20:15:20.320Z","supportTier":"standard","customerType":"Prospect"}
If we just want to get back the _id value, we would set our expression to body._id. The full configuration for this is shown below:
- Key - a string used to uniquely identify the value for this instance of the task.
- Label: the label used when displaying the variable in the Request Detail, Rules, Prefills, and Reports
- Data Type: the data type being captured
- Expression: the JSON-Query expression used to parse the raw response and get the value for this variable.

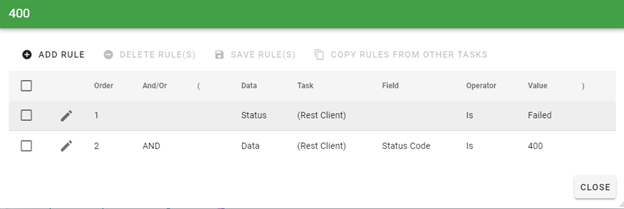
REST Error Handling
If the REST client fails, we provide the failure response codes so you can build appropriate handling rules. Here is a simplified example:
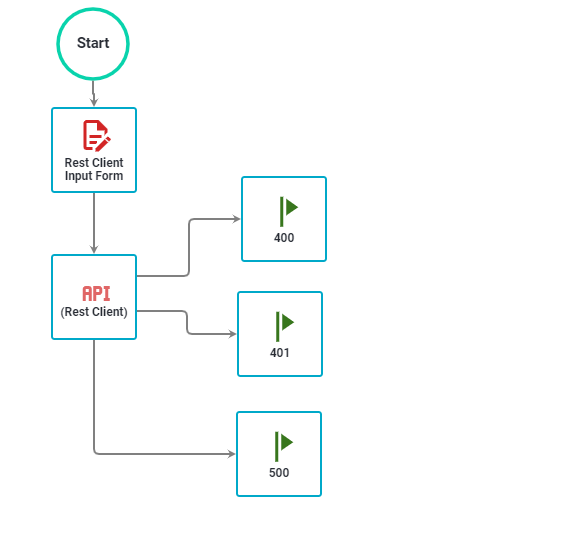
The REST Task is configured thusly:
And the subsequent milestones are configured to receive the codes. This is the example for the 400 error milestone shown above. The rest are configured similarly.
Test
The Test tab allows you to test your configuration based on the settings you have saved. Be sure to click the Save button on each tab prior to running your test. Below is a screenshot of a test:
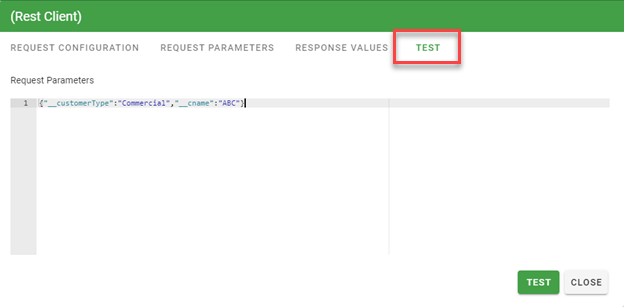
The Test tab will automatically generate the configuration for the Request Parameters. You will need to fill in the values for each parameter.
Clicking the Test button will get the response and parse it based on the Response Values that you have set up. In the example, we defined one Response value with the expression body._id. The raw response body looked like this:
{"__v":0,"active":true,"name":"ACME Anvils Incorporated2","_id":"52b4a1b922102e315700000e","licenses":[],"users":[],"supportContracts":[],"created":"2013-12-20T19:59:53.259Z","supportTier":"standard","customerType":"Prospect"}
The expression body._id extracts just the _id value from this response. Test results are returned in an array of JSON objects that has the key, label and type that were defined in the Response Values tab along with the value returned by the JSON-Query expression.