Standard Task: Excel Batch
The Excel Batch task can be used to launch requests based on the individual data rows within an Excel spreadsheet. When a process with the Excel Batch task is launched the requester will be presented with a file attachment question.
Excel Batch Configuration
Select Configuration > Configure Task to access the window below:

NOTE: THE FOLLOWING MUST BE CONFIGURED ON THE SETTINGS TAB:
- Sample Spreadsheet in Format to be uploaded: Attach a sample or template of the spreadsheet that will be uploaded as part of the request.
- Process to Launch: Select the process that should be launched for each row of data.
- Form task in launched request to receive data: Select the form task in the process being launched that you want to pass data into. Normally this will be the first form task in the process.
- The requester of launched process: Allows you to set the requester of the request launched by the Excel Batch task based on the following choices:
- This requests requester - Sets the requester of the launched request to the requester of the parent request that contains the Excel Batch Plugin Task.
- This requests client - Sets the requester of the launched request to the client (on behalf of) of the parent request that contains the Excel Batch Plugin Task.
- Select User - Allows the selection of a specific user to be the requester of the launched request. (This is set via the optional setting explained below.)
- Client of launched process: Allows you to set the client (on behalf of) of the request launched by the Excel Batch Plugin based on the following choices:
- This requests client - Sets the requester of the launched request to the client (on behalf of) of the parent request that contains the Excel Batch Task.
- This requests requester - Sets the requester of the launched request to the requester of the parent request that contains the Excel Batch Plugin Task.
- Select User - Allows the selection of a specific user to be the client of the launched request. (This is set via the optional setting explained below.)
- Parent view options: Defines the visibility of data between the Excel Batch (parent) and subsequent launched (child) requests. View options include:
- Child and parent requests can not see each other's details - The request detail of the request containing the Excel Batch (parent) Plugin Task will not contain a link to any launched child request, and the link back to the parent request will not be visible in the request detail of any child requests.
- Parent can see child request's details, but child can not see parent's - The request detail of the request containing the Excel Batch (parent) Plugin Task will contain a link to each launched child request, but the link back to the parent request will not be visible in the request detail of any child requests.
- Child can see parent request's details, but parent can not see child's - The request detail of the request containing the Excel Batch (parent) Plugin Task will not contain a link to any launched child request, but the link back to the parent request will be visible in the request detail of any child requests.
- Parent and child requests can see each other's details - The request detail of the request containing the Excel Batch (parent) Plugin Task will contain a link to any launched child request, and the link back to the parent request will be visible in the request detail of any child requests.
- Child view options- Defines whether or not the request detail link and data what will be visible between the launched (child) requests.
- Siblings can not see this launched request - This prevents launched (child) requests from seeing data from one another.
- Siblings can see this launched request - This allows launched (child) requests to see data from one another.
ADDITIONAL SETTINGS:
-
Skip the first row of the spreadsheet: Selecting this allows you to skip launching a new request for the 1st row of data in the file when it is processed. 2019-08-18 Update: This should always be turned on (unless your spreadsheet only has one row and no headers)
- Name of launched request: 2019-12-09 Update: This is a required field and should always have a value. Allows you to provide a name for the launched requests.
- Set requester to the following user - If "Select User" is chosen for "Requester of launched process" above, this field will allow you to define the user.
-
Set client to the following user - If "Select User" is chosen for "Client of launched process" above, this field will allow you to define the user.
To continue, click "Save."
Next edit the Mappings tab.
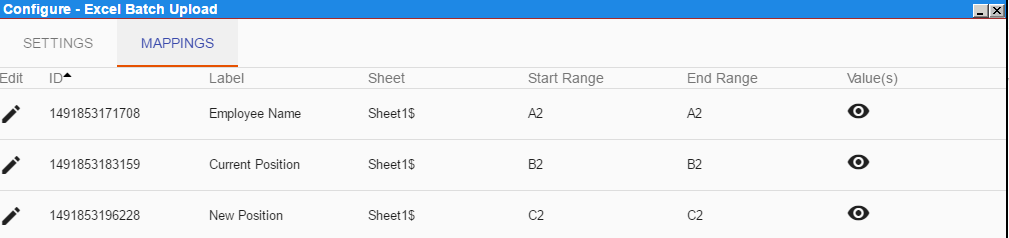
This tab will show a list of questions selected in the "Form task in launched request to receive data" option on the Settings tab.
To complete the configuration, you will need to provide mapping information for each question that you wish to populate with data from the uploaded excel file. This includes:
- Sheet: This defines the sheet within the excel spreadsheet file from the 'Sample Spreadsheet in Format to be Uploaded' option of the "Settings" tab where the data range is located.
- Start Range: This defines the first cell of the spreadsheet data range that you are mapping to the given question label on the form. If reading one line at a time, use 1 as the row number, even if using the "Skip first row" option.
- End Range: This defines the last cell of the spreadsheet data range that you are mapping to the given question label on the form.
For most Excel Batch processes, the start and stop range of any field will be the same. If more than one cell is defined between the Start and End range, the question will be populated with a comma separated list of values from the spreadsheet. Review the training example below for further explanation.
Click "Close" to complete the configuration process.
Note: Once you have configured the Excel Batch, you should review the 'Form Settings" tab of the form task configured as the "Form task in launched request to receive data" to determine if and how you want the form being populated to be completed. Specifically, you can set the task to auto-complete when it is triggered by the Excel Batch process.
To do this, go to the Form Task for this process and select Configuration > Configure Task. Select "When process is launched as a child request" from the field titled "Auto-Complete this task with pre-fill data."

Training Example
In our training example, we have a spreadsheet that is a list of employees and changes. We want to load this file and use it to trigger a process that handles Employee Change requests. The first form of this process has questions assigned to receive information for the changes. The process can then route future tasks to specific users based on the type of change requested.
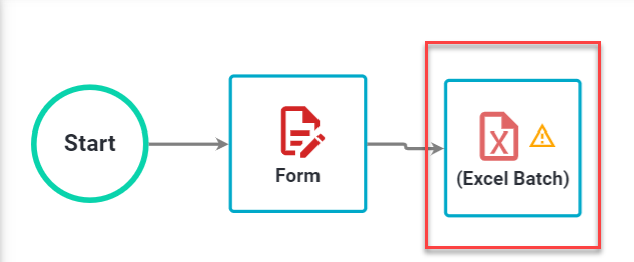
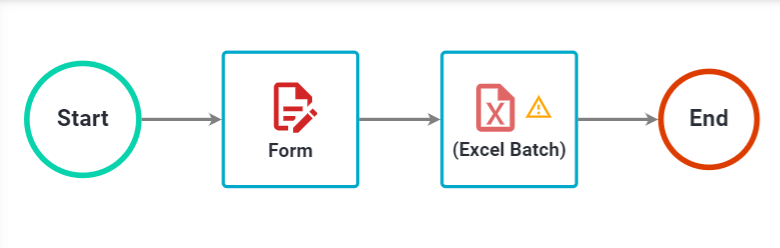
The Excel Batch process is a simple process that contains only this plugin as shown:
The data in the excel file that will be uploaded is below:
| Employee Name | Current Position | New Position | New Department | New Supervisor | New Location | Benefits Change? | Salary Change? |
| Kent Garbee | Account Manager | Account Director | Sales | Joe Green | Chicago | no | yes |
| Cole Buchman | Director of Sales | VP of Sales | Sales | Will Smith | Dallas | yes | yes |
| John Smith | Support Rep | Support Rep | Support | Kathy Bates | New York | no | no |
| Elena Osuna | Level I Accountant | Level II Accountant | Finance | John Isod | Chicago | no | yes |
| June Taylor | Accounts Payable Rep | Accounts Payable Manager | Finance | John Isod | Chicago | yes | yes |
The configuration for this task is as follows:
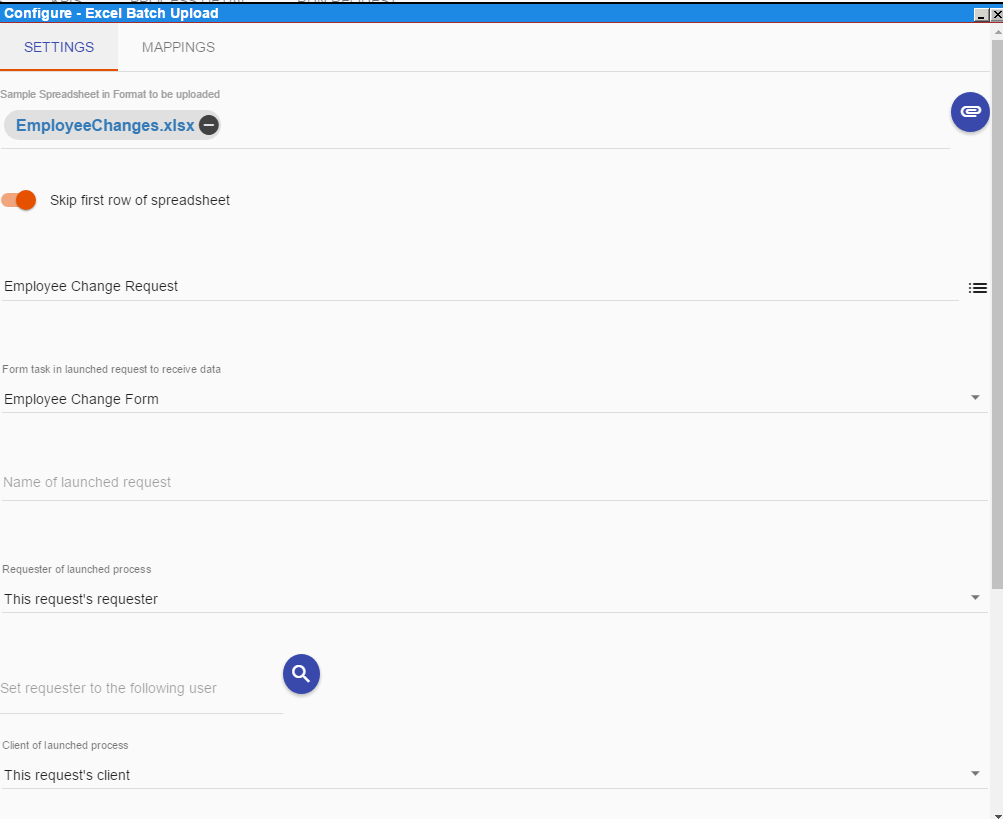
You can see that the EmployeeChanges spreadsheet has been uploaded and we have configured the process that we want to be launched, as well as the form task within the process that will receive each row of data. Also, because my spreadsheet has a header row in it, I've selected to skip the first row of results.
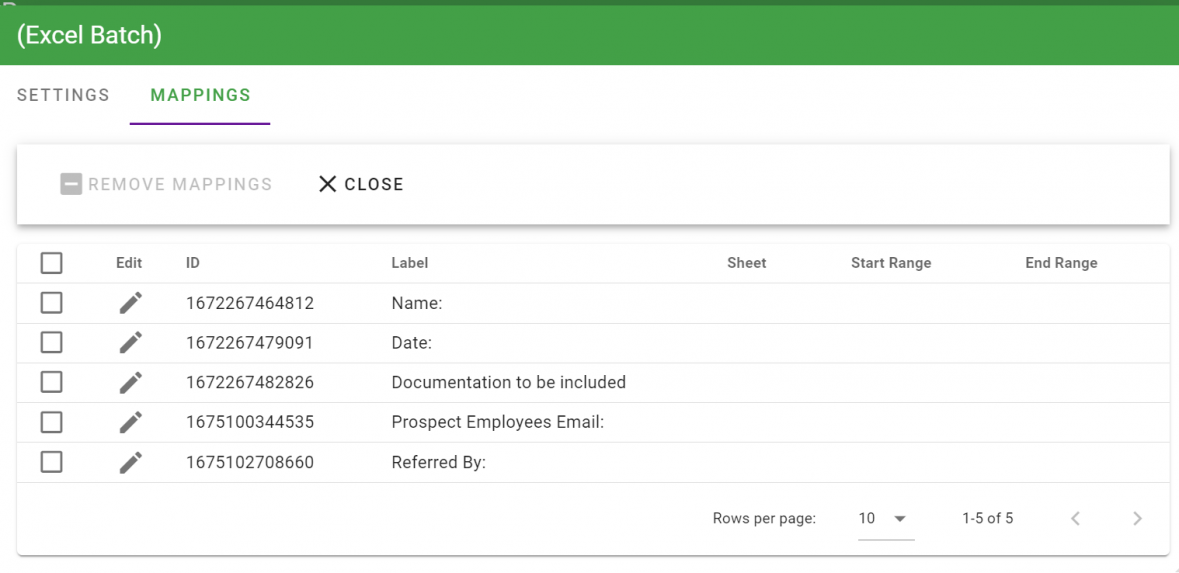
Once I click "Save" the Mappings tab is made visible.
I configure each question that I want to be prefilled:
As noted above, this example should use row 1 instead of row 2 when configured. And the Value(s) icons are no longer displayed, however the value you targeted will appear in a pop-up during configuration.
Click 'Close' when you have completed the mappings.
In addition to processing and creating the individual requests based on the spreadsheet, I also want to route the second task within my child or launched requests based on the data in the spreadsheet.
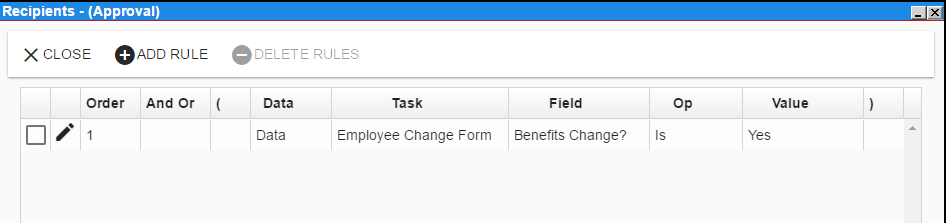
Begin by adding each recipient to the Approval Task like you would with any standard Approval Task:
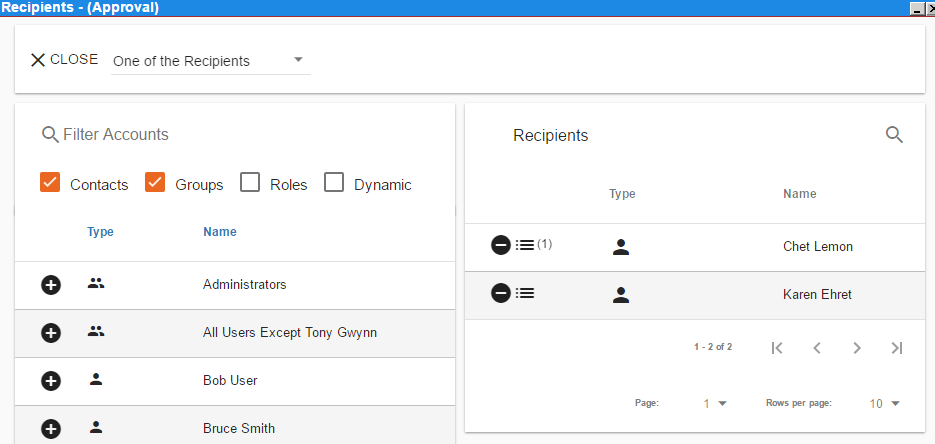
I then add a rule for each that uses Data as the Source. In this case, I select the form that the Excel data will be mapped to and choose "Benefits Change" as my field and enter "Yes" as the Value.
In other words, this will now route all requests that include a benefits change that are created as a result of the Excel Batch process to Chet Lemon.